What if you could get video content without having to set up a camera, figure out great angles, and say the right words articulately, because a single app, a one-for-all video-generating app, says it could do it all for you?
Only a few content creators and video marketers would say no to that. It’s like Christmas day, but this time, every day is Christmas on your desktop or mobile, as long as you log in to the Pippit AI website.
But talks are pretty cheap, and so actions need to match them. That’s why I dedicated irretrievable time and unwavering attention to Pippit AI. If it says it could do all these, I might as well join in on the thrill and experience them for myself.
In this article, I’m writing down everything I found out. I’ll cover its features, pricing, pros and cons, practical usage of these features, recommendations for four alternatives, key takeaways, and a personal note (or “verdict” if you prefer that term).
Let’s get on with it.
But what is Pippit anyway?
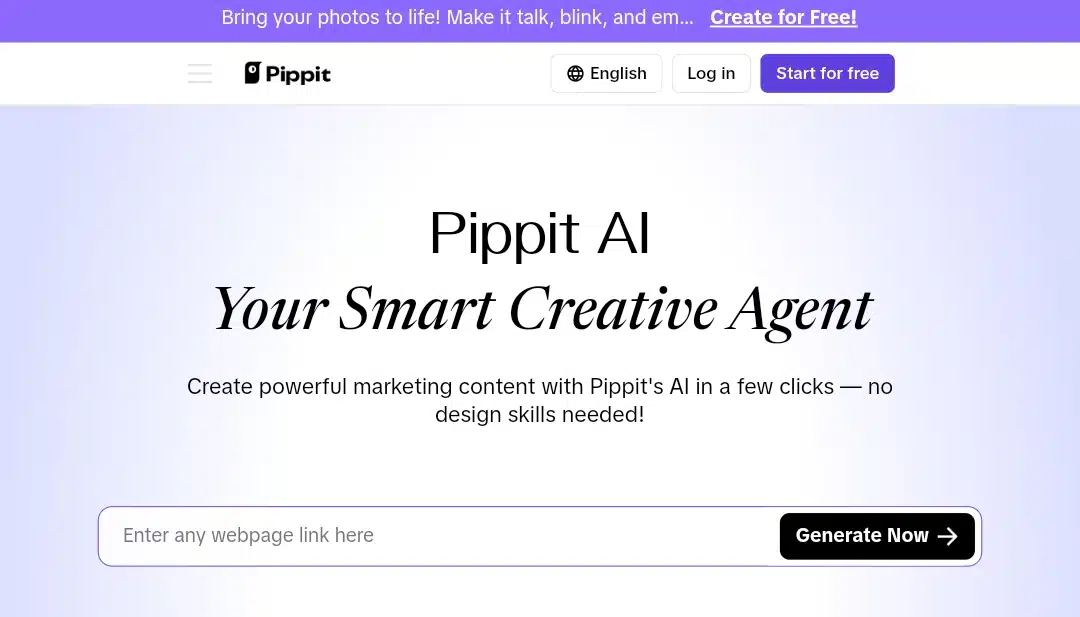
Pippit AI is a content-generation tool designed to help you create short-form marketing assets, such as videos, posters, and product images. It’s part of the CapCut product family, connecting users closely with TikTok and other platforms under the ByteDance umbrella. That connection gives it a natural edge when it comes to integration with social-first workflows.
The app doesn’t try to do everything. Instead, it centers on visual content tailored for sales, brand visibility, and digital engagement. Think of it as a toolkit for businesses, creators, or marketing teams that need consistent content without starting from scratch every time.
While it’s a relatively new thing on board, its direct tie-in with CapCut and TikTok shows that its focus lies on short videos, product visuals, and scalable content pipelines. If you’re already in that space or looking to move into it, Pippit AI aligns well with that goal
Unlike Capcut, Pippit AI runs on a web interface, so no app download is needed. You work within a structured dashboard and gain access to templates and tools designed to shorten your production timeline and streamline the process of building visual content.
When you should use it
Use Pippit AI if you:
- Run a small brand and need regular social content without hiring a designer or video editor
- Sell products online and want to generate promotional videos, product listings, or sales posters quickly
- Create for TikTok, Instagram, or YouTube Shorts, and need tools that support those formats directly
- Work in a team that handles client campaigns and needs a simple way to manage assets and publish across channels
- Want a lightweight tool that connects creative content directly to shop links or performance metrics
- Need branded visuals that still follow platform trends, especially for seasonal marketing
- Prefer starting from templates or visual prompts rather than building content from scratch
- Are looking for a focused alternative to more general AI tools that don’t specialize in marketing visuals
When you shouldn’t use it
Skip Pippit AI if you:
- Focus on long-form content like blogging, academic writing, or podcasts
- Want advanced editing tools for cinematic videos or full-length commercials
- Need high-level analytics, CRM features, or platform-wide campaign coordination
- Work in industries that rely more on text-heavy assets than visual-first media
- Prefer full offline access or downloadable software over web-based platforms
- Are looking for a general-purpose AI assistant for business tasks beyond content creation
Now, let’s explore the tools that make Pippit AI what it is.
Pippit AI features and how they work
One-Click Video Solution
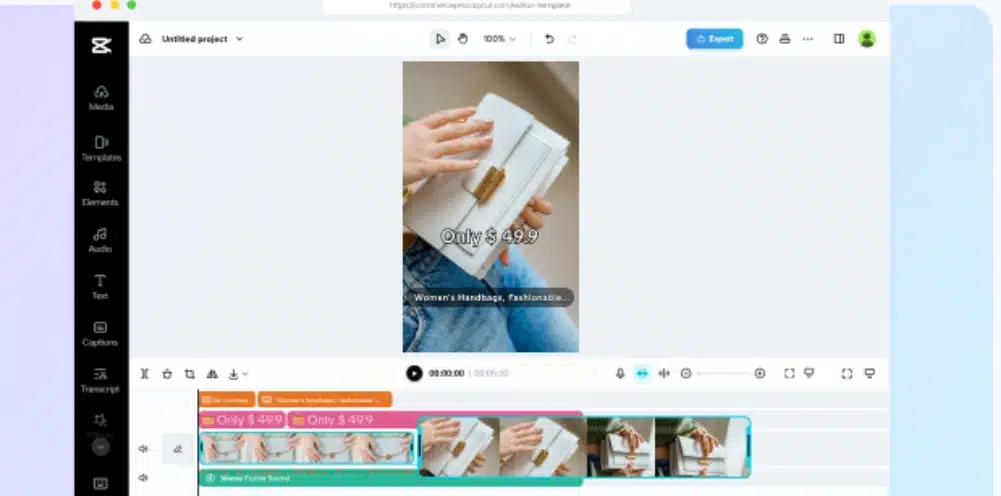
The One-Click Video Solution in Pippit AI allows you to create marketing videos by either entering a product URL or manually uploading product visuals and descriptions. Once you provide that input, the tool automatically generates multiple video drafts.
It includes an option to add product links to the generated content, which can help connect videos directly to sales pages. The tool also handles platform formatting by resizing and adjusting the content to fit social media specifications. There’s batch export functionality that enables exporting several videos at once.
The tool includes multi-track editing capabilities. You can adjust transitions, animations, effects, and audio using keyframe controls. While the core function is automatic video generation, the editing tools allow for more detailed refinements when needed.
AI-powered product images

The AI Product Images tool in Pippit AI allows you to generate product photos in batches, supporting use cases across Shopify, TikTok Shop, Amazon, and other marketplaces. You can select items from your product listings or upload new visuals, and the tool automatically removes the background.
After that, you can apply curated lifestyle backgrounds to match your branding or promotional theme. An AI-powered shadow adjustment system adds natural-looking depth and dimension to your images.
For ad content, you can convert standard product shots into banner-style layouts with logo placement, calls to action, and other branded elements. If you’re selling apparel, there’s an AI try-on option that shows how clothing items might look on diverse model types in different poses.
Batch editing is also included, letting you apply changes like cropping, resizing, and resolution tuning to multiple images at once. This helps streamline edits for multi-platform publishing.
AI avatars and voices
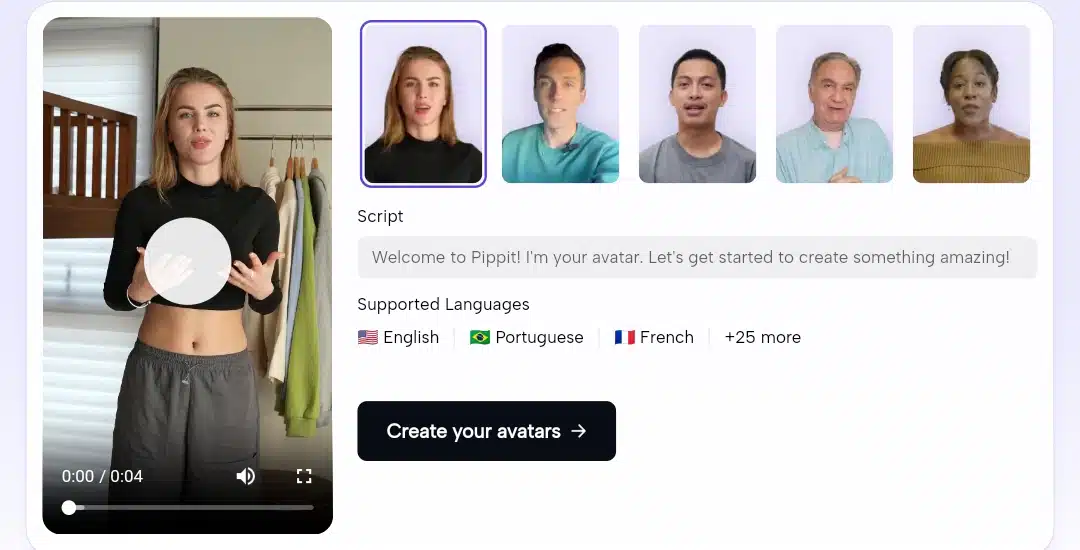
Pippit AI’s Avatars and Voices feature is engineered to help you generate professional-looking video content using realistic digital characters. These avatars can be customized to match a broad collection of branding styles, with over 80 options spanning diverse ethnicities, age groups, and visual aesthetics.
Each avatar is animated with hyper-realistic movement. Facial expressions, gestures, and body language are subtly rendered to add more life and nuance to the content. Whether the use case is product explanation or audience engagement, these characters are built to feel less robotic and more natural.
Alongside the visual customization, this tool includes a multilingual text-to-speech engine that converts scripts into spoken audio. Over 50 AI voices support more than 20 languages, and these voices are designed to mirror authentic human accents, speech rhythms, and tonal variations to build connections across global audiences.
Flexible background handling is also included. Users can remove or swap out backgrounds to fit different formats or brand settings, offering more creative control. This means avatars can be layered seamlessly into different video templates without additional editing tools.
From creating tutorials to launching short-form ads, this feature allows quick assembly of avatar-led content without hiring voice actors or filming in studio conditions.
Pre-cleared commercial creative assets

The asset library is explicitly curated for online sellers, featuring studio-quality visuals designed to elevate storefronts, social media posts, and digital advertisements. These templates are built with conversions in mind, blending aesthetic design with marketing intent.
Music and font collections are also included. The music library features pre-cleared tracks suitable for both organic and paid content, while the font selection offers a range of typefaces for creating branded material. These resources help users avoid the hassle of licensing or sourcing assets from third-party sites.
New assets are added weekly, ensuring users can access fresh and relevant content to keep up with seasonal trends or platform shifts. Everything is quality-checked and organized for e-commerce usage, making finding what’s needed quickly easier.
This feature enables faster content creation while keeping all outputs commercially compliant by removing the stress of licensing and production sourcing.
Auto-publishing and analytics
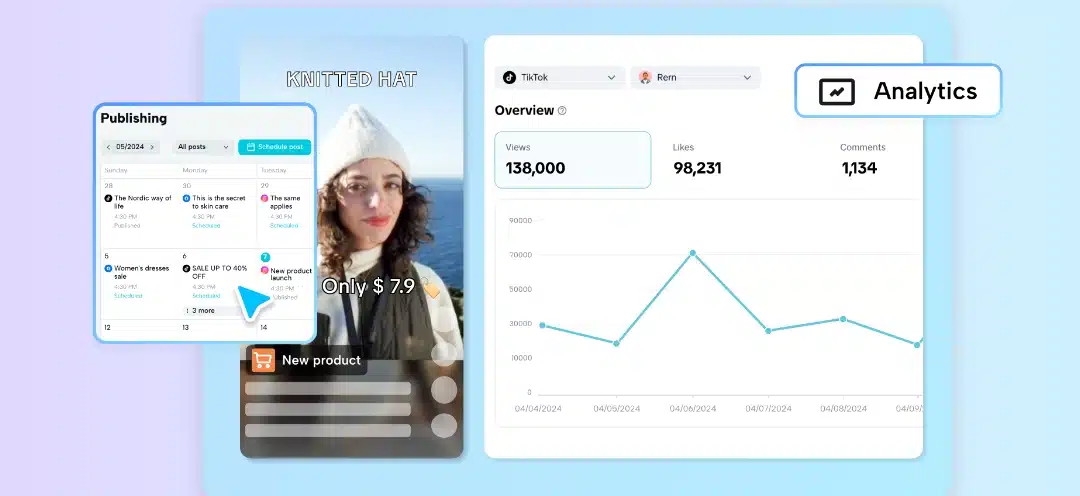
The Auto-Publishing and Analytics feature in Pippit AI lets you plan, schedule, and monitor content across multiple social media platforms from a single dashboard. It functions as a centralized calendar, allowing you to organize posts in advance and select specific times for automated publishing.
This tool helps you publish on platforms like TikTok and others without needing to post manually each time. It also includes the option to add product links directly to content, turning posts into shoppable assets that link back to listings or storefronts.
Beyond scheduling, the analytics dashboard gives you post-performance data in real time. You can track views and engagement rates and compare how content performs across different platforms. It includes comparison metrics, audience insights, and performance breakdowns that help refine future content strategies.
This simplifies team coordination and aligns everything with campaign goals and posting timelines.
Let’s see how I signed up for Pippit AI to use these features.
How I got started on Pippit AI
Here are the steps I followed:.
Step 1: Signing up and entering the dashboard
I tapped the “Start for free” button on the top-right corner of Pippit AI’s welcome interface to get started. That took me to a login screen where I could sign up using social media, email, or Google. I chose the email route
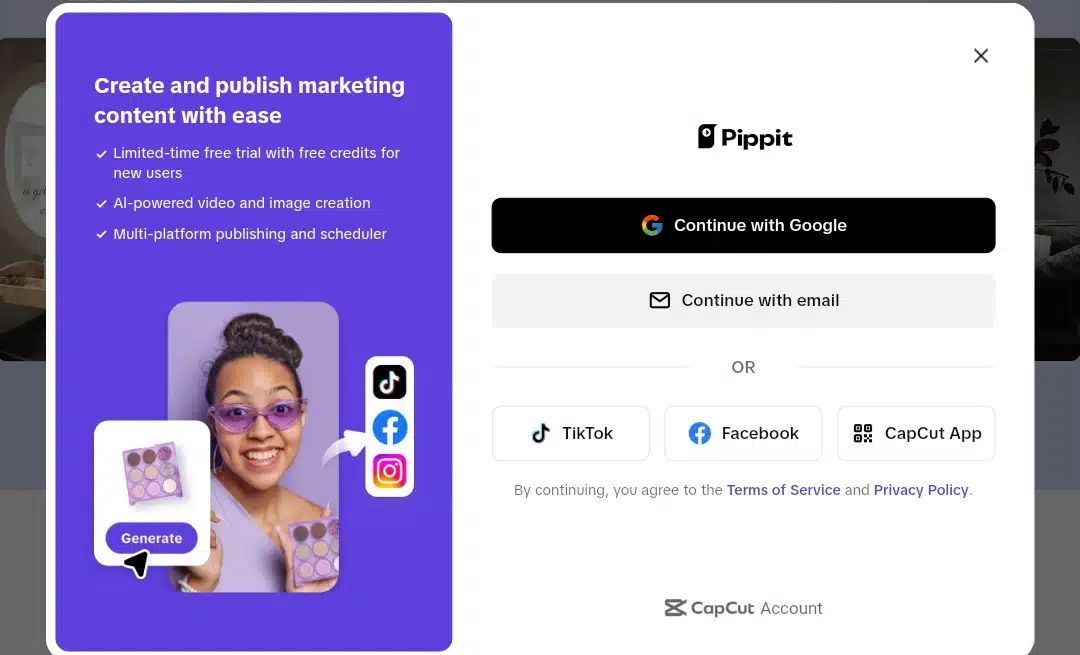
After entering my email, I was directed to a sign-up page where I had to create a password, which needed to be between 6 and 20 characters.
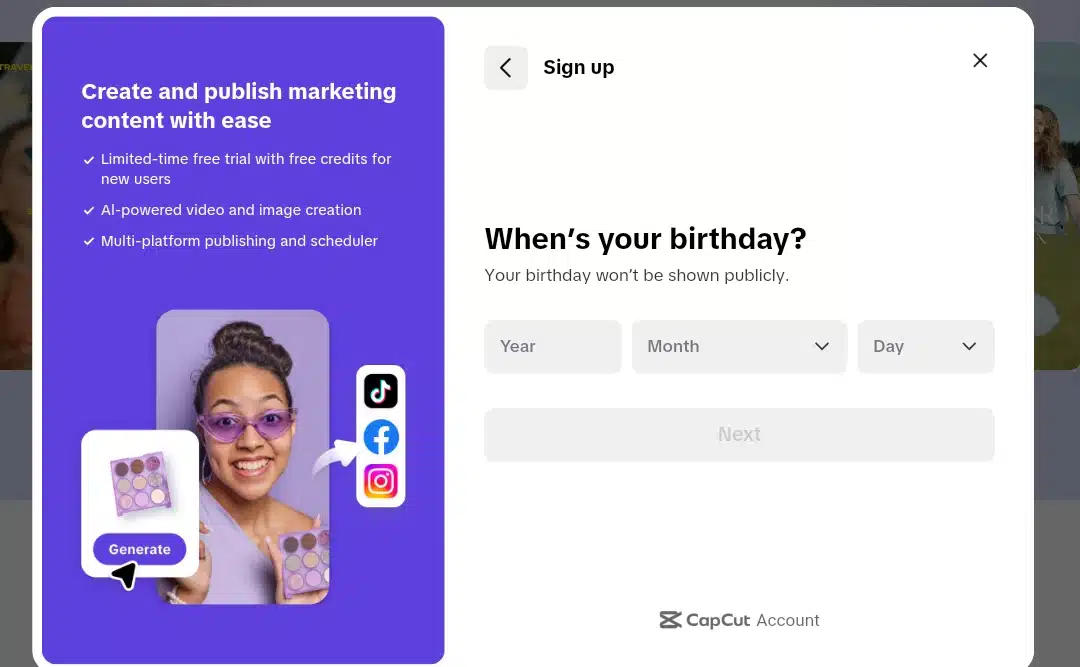
Once I submitted that, a verification code was sent to my email. I had to check my inbox and copy and paste the code to complete the registration. Right after that, Pippit asked for my birthdate to confirm my age, likely a basic compliance check to verify that I’m old enough to use the platform.
With that done, I was introduced to Pippit’s main dashboard.
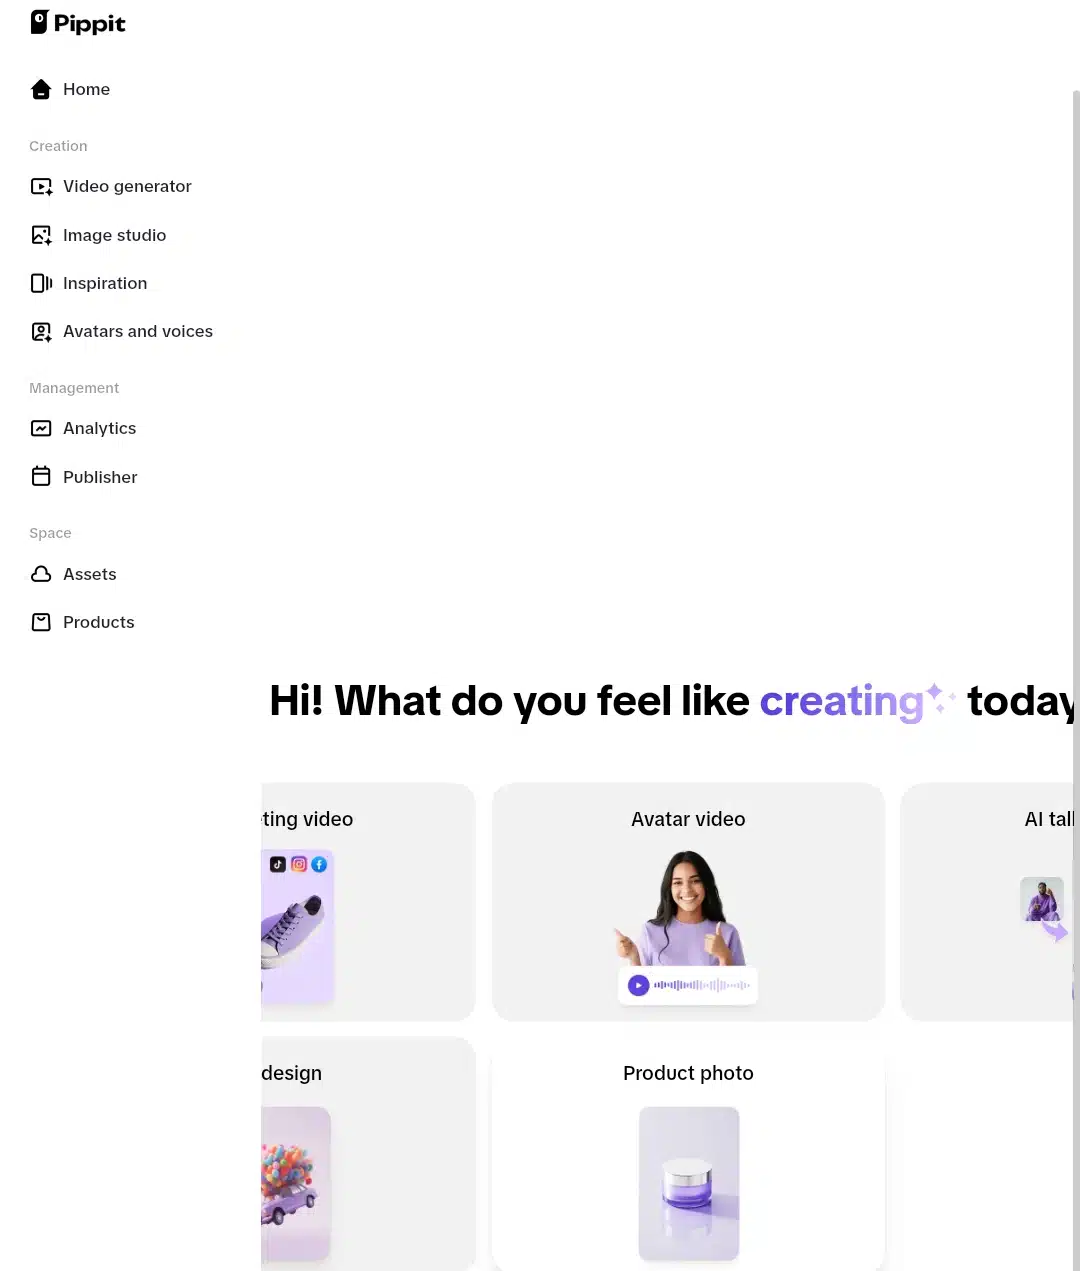
It was a clean, well-organized interface that was not overwhelming. All five core features I’d read about earlier were laid out in one place: a One-Click Video Solution, AI Product Images, AI Avatars and Voices, Auto-Publishing and Analytics, and Pre-Cleared Creative Assets.
Step 2: Choosing a tool to test — Image Studio
I decided to try the AI Product Images tool first for this test. I wanted to see how it handles batch product photos and what visuals it could generate for a hypothetical product. The Image Studio promised fast, professional-grade results, and I was curious to see how much control I’d have over things like backgrounds, shadows, and layout.
Step 3: Trying out the Image Studio
When I entered the Image Studio, I immediately saw a few tools. There was an option to remove the background from an image, another to add an AI background, and one for scaling or resizing pictures. I also noticed a feature that lets you generate an image with AI, and that one stood out to me the most.
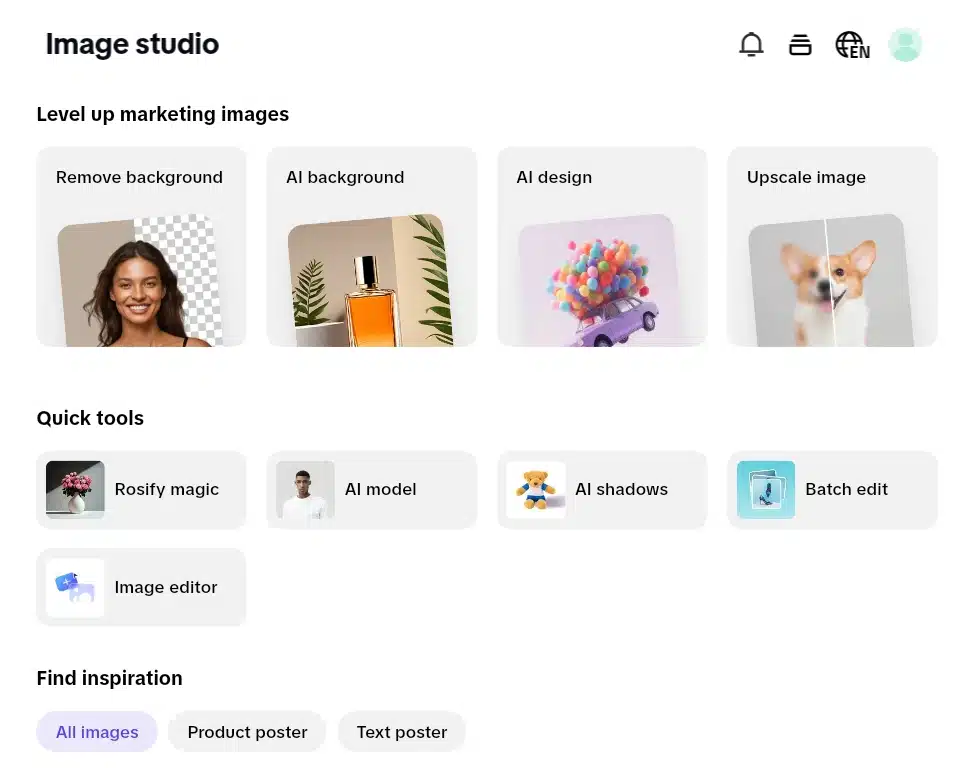
Besides that, there were two other tools: Product Poster and Text Poster. From the names, it seemed like you could turn a regular image or text into a promotional design. But I wanted to test the AI image generation first and see how it actually worked. So I clicked on AI Generate to begin.
Step 4: Exploring the AI image generator in Pippit AI
Once I entered the Image Studio, I navigated to the AI Design section. The layout was straightforward, with a left panel holding all the creative controls. At the top of the panel was a prompt field labeled “Describe the image you want to generate.” That’s where I would type the concept for the AI to interpret visually.
Below the prompt field, I noticed a dropdown option to specify whether I wanted the image to reference any uploaded material or just rely on the written description. By default, it was set to “Any image,” but this could be changed if needed.
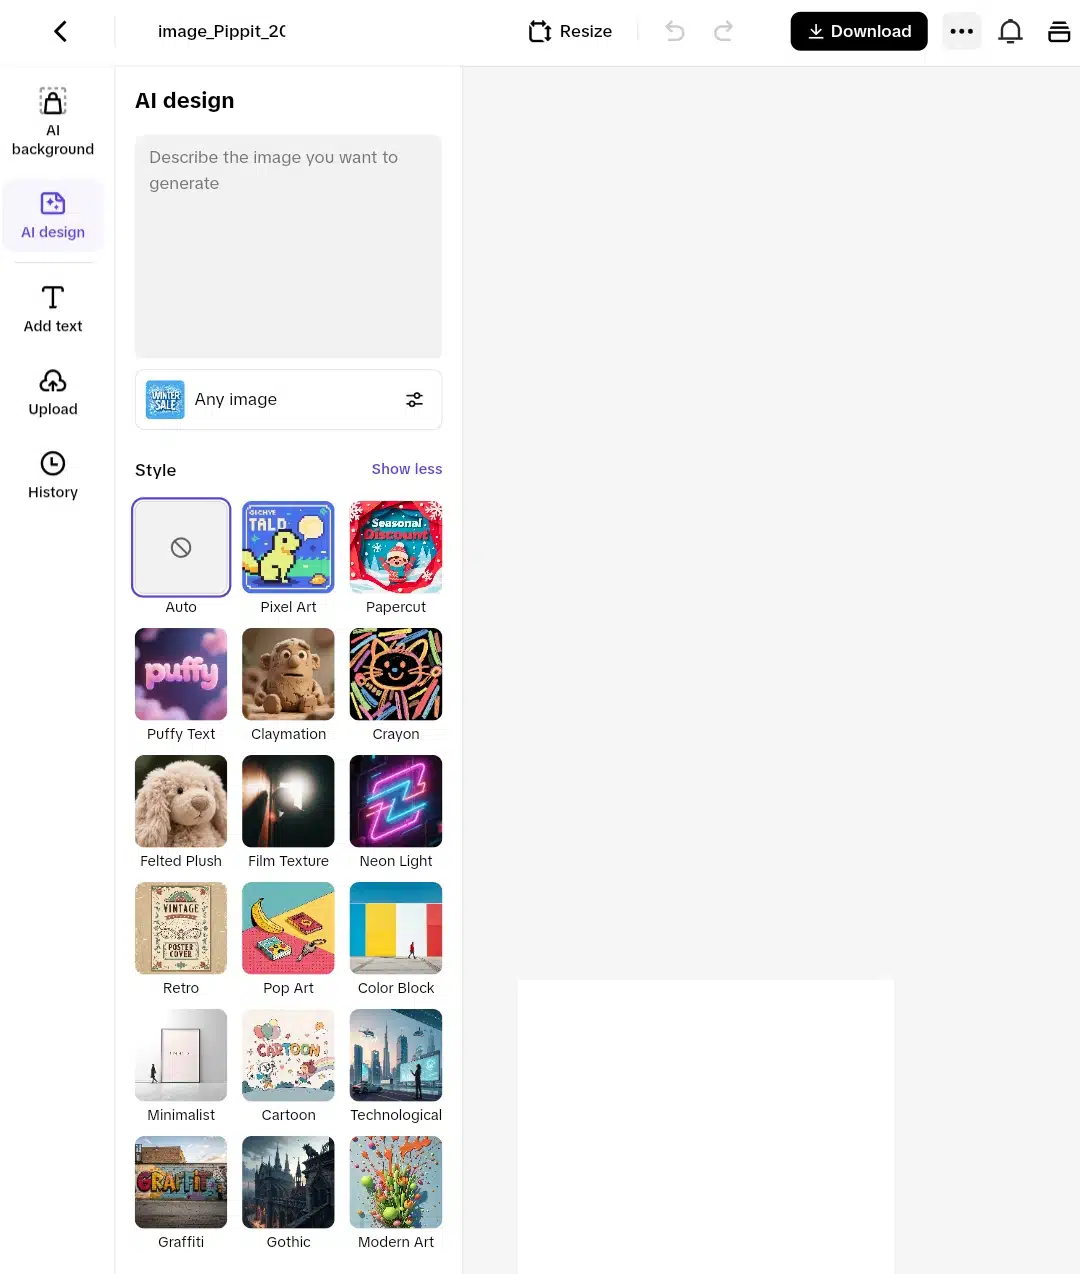
The interface also offered an impressive catalog of style filters. These were clearly grouped as creative presets I could apply to control the artistic look of the final output. The options included everything from playful formats like Pixel Art, Papercut, and Claymation, to more serious or atmospheric styles like Gothic, Technological, Film Texture, and Minimalist. Other standout categories included Puffy Text, Retro, Cartoon, and Crayon, giving me a wide range to experiment with depending on the product or vibe I wanted to convey.
The side panel also included AI Background, Add Text, Upload, and History tabs. These showed that I could either remove or replace an image background using AI, overlay marketing copy directly, upload images for reference, or revisit previously generated visuals, making it a relatively complete and flexible creative toolkit.
I generated a promotional image for a hypothetical product: a waterproof travel pouch to test the tool. Here’s the image prompt I typed into the box:
Prompt to copy and use in Pippit AI:
“A waterproof travel pouch resting on a sunlit beach towel with sunglasses beside it, styled in modern art, minimalist background, with subtle branding and vibrant summer colors. High-resolution, product-focused layout for online ads.”
Then I scrolled down to the Generate tab. It generated 4 images at first, but I could still generate more, so I clicked on that. I could download the image, resize it, and change the background color.

Then I returned to the home page to try out the video generator. This time, I decided to explore Pippit AI’s avatars. Here’s how it went down.
Step 5: Creating an AI avatar
I wanted to see how well Pippit’s AI avatars hold up, not just in terms of voice or animation, but also whether they feel believable enough to use in actual branded content. The range of avatars available drew me in first; it promised diversity in appearance, tone, personality, age, and gender. That intrigued me and made me realize how expressive these avatars would really be. If their voices matched the visuals. And how their facial expressions and gestures would carry meaning in such a short time. The video I made would be short (only 6 seconds long), and the tool offers caption styles and language options similar to what you’d find in CapCut, making it easy to localize or stylize content. And an export button to get the video into my gallery.
The avatar I picked felt perfect for a college-style message. Her outfit looked casual but put-together, and her body language had this open, easygoing confidence (hands stretched out mid-sentence) like she was talking to a group of new students. The background also worked. It looked like a real outdoor wall, not some awkward stock scene, and the whole frame gave off a relaxed, campus-life feel.
For this step, I set out to observe these key details to judge the avatar by:
- Lip sync precision and how well it matches the script
- Facial expressions and whether they change naturally with speech
- Eye movement, blinking, and liveliness
- Body language and how well gestures align with tone
- Voice emotion and whether the audio sounds robotic or realistic
- Scene cohesion, especially how well the avatar blends into the background
Since the video must stay within a 6-second limit, I wrote a quick, context-aware prompt to match the avatar’s student outlook.
“Hello, I’m Ava. Are you going to be joining us for the weekly book discussion this Saturday? Can’t wait to see you! 🙂”
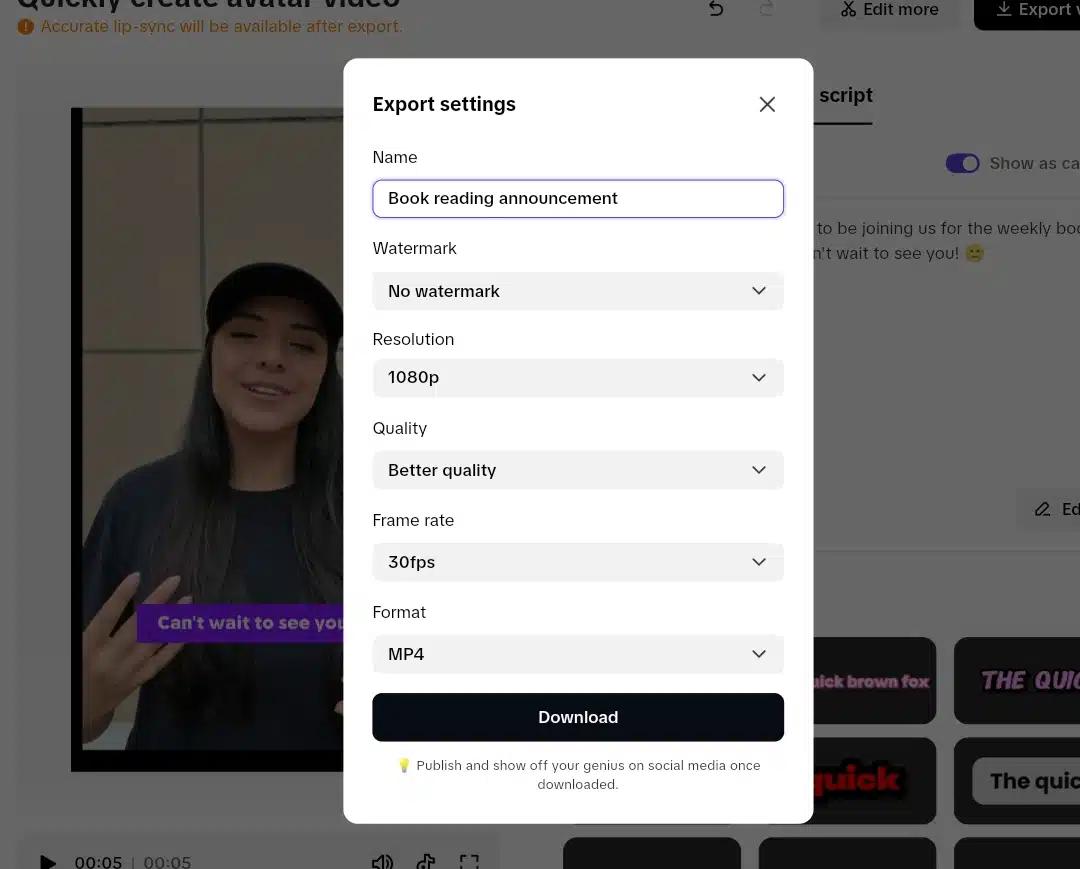
When I previewed the video inside the editor, the lip sync didn’t fully align. The timing felt slightly off, like the mouth movements trailed behind the voice. I noticed a message saying lip sync would only be fully rendered in the exported version. So I went ahead with the download process.

The export form included several fields. I named the file “Book reading announcement”, selected “no watermark,” and set the resolution to 1080p. For the FPS (frames per second), I chose 30, which is standard for most video platforms and should ensure smooth playback. The output format was MP4, and I selected the “better quality” option before hitting download.
Once it had finished downloading, there was a push publication option where I could publish it on Instagram, TikTok, and Facebook, just like CapCut gives, but I didn’t choose this. Instead, I went to my gallery to see how it would turn out, and here is what I got.
Eye movement was where things fell short. The AI Avatar blinked, which helped, but it didn’t feel natural. Her gaze didn’t shift or track anything, so the avatar came off a bit stiff in that area. 3 out of 5.
When it came to gestures, the movement was too repetitive. The avatar kept her hands stretched slightly forward the entire time, flicking them like someone casually talking. But when the script said “can’t wait to see you,” I expected a more direct gesture like pointing at the camera, but that didn’t happen. 2.5 out of 5.
The AI avatar’s facial expression was solid. Her smile matched the tone of the message, and her eyes didn’t look dull or lifeless. 4 out of 5.
The voice sounded close to natural and carried a decent emotional range, with good pacing and tone. I’d give that 5 out of 5.
The background looked believable and professionally rendered. And the video resolution, set at 1080p, was clean and clear. Both get 5 out of 5.
However, the video wasn’t quite smooth. The motion didn’t glitch, but her body movement lacked natural weight, which made the video feel less fluid. 3 out of 5.
My recommendation
If you’re looking for a fast way to create short, presenter-style videos without stepping in front of the camera, Pippit’s AI avatar tool is a helpful starting point, but it’s not a complete replacement for real video just yet.
The voice is solid, and the background looks clean, but the lack of expressive gestures, stiff eye movement, and slightly off lip sync make the output feel a little mechanical. It’s fine for casual messages or placeholder content, but I wouldn’t rely on it alone for anything customer-facing or personal.
Personally, I’d recommend using it as a draft tool, then switching to recording yourself if you want something more natural. From there, you can bring the clip into Pippit’s video editor and edit using the app’s captions, cuts, or branding features. That way, you still save time, but don’t compromise on realism.
However, if you’re considering upgrading for longer avatar videos, it might be worth it only if you produce content in bulk and don’t mind some stiffness in the delivery. Otherwise, your phone camera and Pippit’s editing tools can do a better job together.
Speaking of upgrades, how much does Pippit AI cost? Let’s find out below.
Pippit AI pricing
When I tried to check how much Pippit AI actually costs, I didn’t get an instant answer on the main dashboard. The interface initially made it seem like everything was free to use, but that changed once I began pushing the limits of the available tools. Eventually, I located the full pricing breakdown behind a separate link, which wasn’t obvious. I can’t seem to know why this is this way.
But here’s what it bills, so you wouldn’t have to search in a labyrinth maze like I did:
Pippit AI runs on a credit-based model. On the free plan, I had access to 150 credits each week, which covered around 2 minutes of video generation and up to 75 images. I could use the Link to Video feature and avatar tools, and I also had access to 500 GB of cloud storage. This free tier worked for trying things out, but clearly had limits. Once I started experimenting more, the cap became noticeable.
There’s a paid option called the Starter plan to unlock the complete set of tools. It’s priced at around $24 per month when billed annually, which provides approximately 21,600 credits per year. This higher-tier plan covers extended use of the complete feature set, including smart cropping, background removal, voice generation, poster creation, avatar customization, and analytics. You also get access to product and content management tools, bulk editing options, multi-platform publishing, and more advanced control over media exports.
It’s worth noting that Pippit doesn’t charge based on how many features you use. Everything falls under one main plan, and you’re only limited by your credits. This makes the pricing structure predictable, especially for content teams or small businesses that manage steady output across multiple platforms. You can cancel the plan anytime, and any unused credits carry over within the subscription period.
So what went well and not?
What I liked about Pippit AI
Without beating around, let’s get into it:
Intuitive design made it easy to get started
From the first login, the interface felt clean and direct. I didn’t have to spend time figuring things out or clicking through menus to find what I needed. Everything—from video creation to image editing—was where I expected it to be. This helped me focus on content creation instead of learning the tool.
It really cuts down content production time
One of Pippit AI’s strongest points is how fast it works. If I wanted to generate a product video or convert photos into banners simultaneously, the delivery window would still work as fast. Even when testing different media types and batch tasks, there were no long waits or freezing issues. This efficiency would be especially valuable for someone managing frequent social content.
It’s well-aligned with e-commerce needs
Many of Pippit’s tools were designed specifically for online sellers. Features like the “Link to Video” option, marketplace-ready image outputs, and product-centered avatars clearly prioritize commerce use cases. I didn’t have to adapt or force my content to fit in. It felt like the platform was already structured around it.
Legal-use creative assets built in
Pippit offers templates, fonts, music, and graphics labeled for commercial use. That meant I didn’t need to worry about licensing when downloading a design or using a video clip in an ad. For someone running campaigns, that peace of mind is essential.
It combines everything in one place
Instead of switching between multiple platforms (video editors, design tools, schedulers), Pippit brings them under one dashboard. I could edit, schedule, and even link product videos to TikTok Shop from one interface. That kind of streamlining is rare and genuinely helpful.
Batch support is a time-saver
Bulk video resizing, image editing, and exports worked without any glitches. I tested this on product visuals, and it handled dozens of files without slowing down. This batch functionality could be a real productivity boost for brands with extensive catalogs.
Strong integration with ByteDance and CapCut tech
The performance and stability of the tool reflect its backing. It runs smoothly and integrates well with platforms like TikTok. Knowing that it’s part of the CapCut/ByteDance ecosystem explains the polished video tools and familiar UX touches.
What I didn’t like about Pippit AI
The free plan has noticeable limits
While Pippit does have a free tier, it doesn’t offer full access. Credits refresh weekly; depending on how much you want to create, they can run out fast. I hit that cap early during testing and had to pause or wait for credits to renew. It’s more of a preview than a valid free option.
The credit system takes some getting used to
Credits aren’t uniform across tools. Some tasks (like avatar creation or multi-export functions) cost more, and that wasn’t clearly explained up front. It took some trial and error before I understood how to use them effectively without running out.
Not all outputs are ready to publish as-is
Although the speed of content generation is impressive, I often had to go back in and make manual refinements. Some design placements or audio transitions needed refinement. If you want a polished brand presence, expect to do some post-editing.
Customization is still somewhat restricted
While the editor has multi-track support, I noticed fewer granular options than standalone tools like Adobe Premiere or Figma. For quick jobs, it’s fine, but for users who want complete control over every visual detail, it might feel limited.
Subscription pricing may not suit everyone
Pippit doesn’t offer one-time purchases or per-project pricing. It’s subscription-based, and the advanced plans can add up. It may be difficult to justify the monthly or annual fees if you only need occasional content or work solo.
These sum up the whole experience. Now let’s look at the 4 pippit AI alternatives.
Pippit AI’s 4 best alternatives
1. InVideo
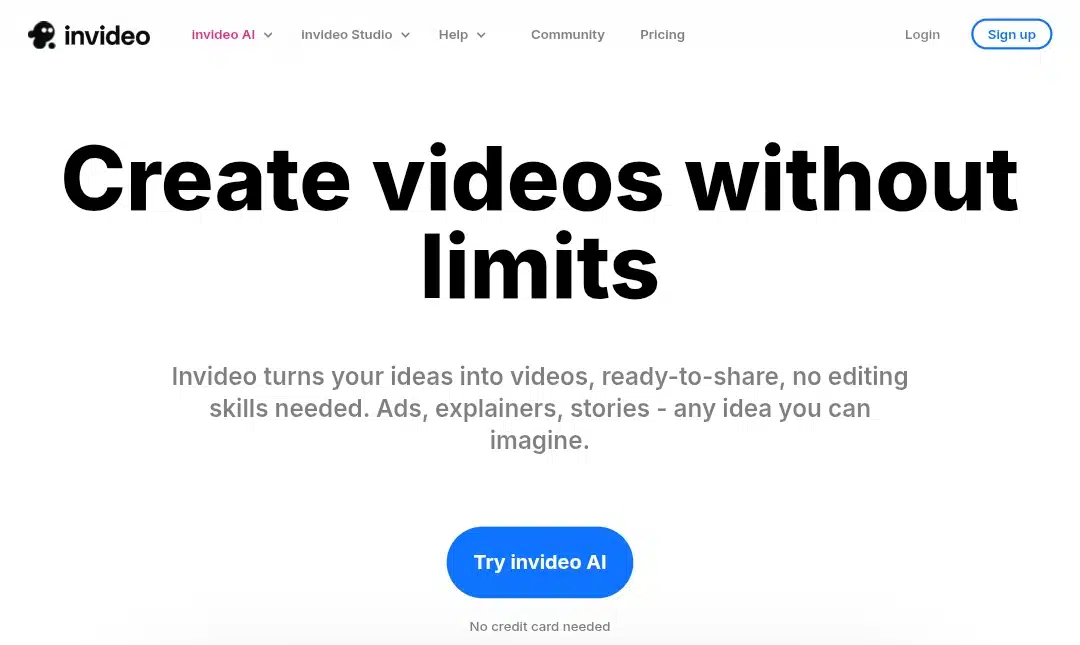
Why it’s a strong alternative to Pippit AI: InVideo is one of the most established AI video creation tools on the market. Compared to Pippit AI, it offers deeper template customization, elaborated design controls, and more flexibility across content types, not just product videos. If you’re looking for complete creative control alongside AI assistance, InVideo offers a more versatile workflow.
Key features:
- AI script-to-video engine: Paste a script, and it automatically suggests visuals, transitions, and layouts.
- Template library: Over 5,000 customizable templates for YouTube, Instagram, ads, and promos.
- Text-to-speech & voiceover support: Built-in voices or upload your own audio.
- Stock asset library: Access to 8M+ royalty-free media files via integrations with iStock and Storyblocks.
- Brand kit tools: Upload fonts, logos, and colors to keep everything on-brand.
Why you should use it: InVideo is ideal if you want more freedom to create marketing videos that go beyond just product visuals. It supports multiple content goals — ads, tutorials, intros, explainers — and is backed by a responsive design engine that works across platforms.
2. Synthesia
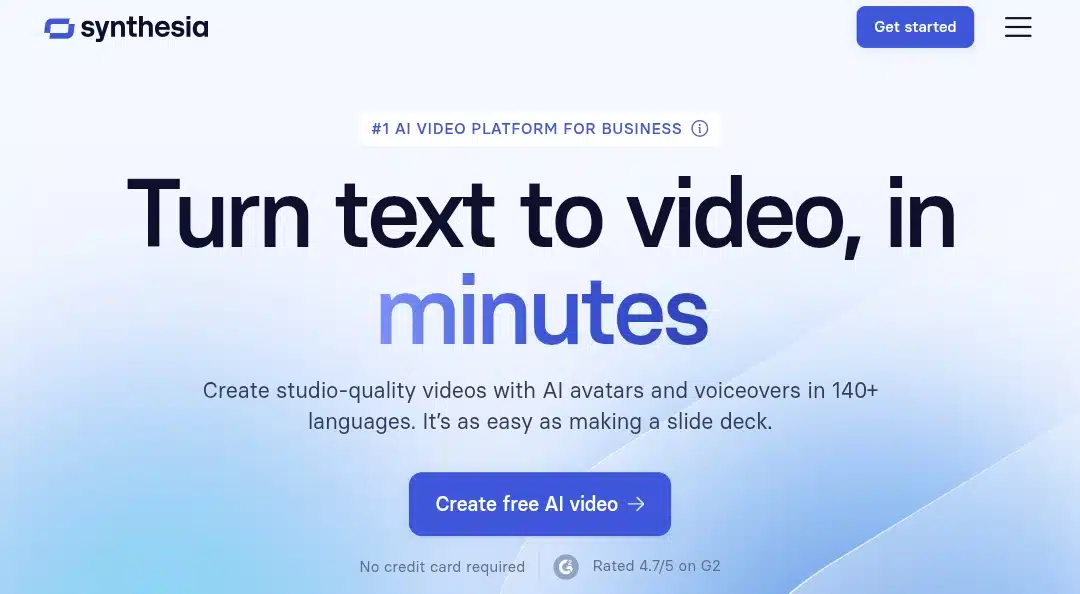
Why it’s a strong alternative to Pippit AI: Where Pippit focuses on product showcase videos, Synthesia automates full-scale business communication. If you need a human face in your videos without filming yourself, Synthesia delivers. It’s better than Pippit for things like training videos, onboarding, demos, and multilingual presentations.
Key features:
- AI avatar presenter: Choose from 230+ realistic avatars to deliver your message.
- Multilingual support: Create videos in over 140 languages and accents with built-in text-to-speech.
- Custom avatars: Enterprise users can clone their own likeness and voice.
- Templates for business use: Pre-built layouts for product demos, corporate updates, and tutorials.
- Web-based editor: All video generation happens online; no downloads or video software are needed.
Why you should use it: Synthesia saves time and cost when you need high-quality, human-like video presentations, especially in multiple languages or at scale. It’s more professional than Pippit for B2B needs and content that requires a human face.
3. Pictory AI
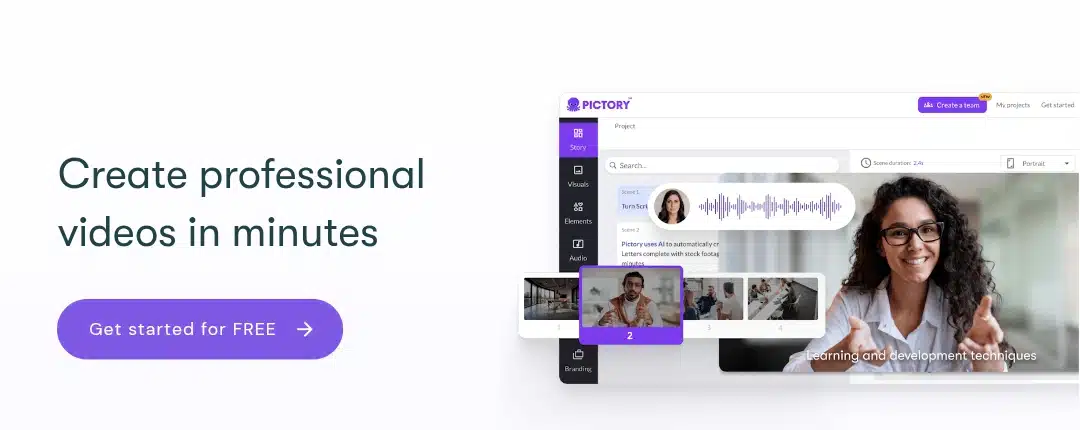
Why it’s a strong alternative to Pippit AI: Pictory stands out for its content repurposing capabilities. Unlike Pippit, which builds product videos from structured inputs, Pictory extracts value from long-form content like webinars, Zoom recordings, and blogs. It’s a smarter fit if your brand already has content and wants to reuse it for social media, reels, or shorts.
Key features:
- Long video summarization: Upload a video and get short clips with key highlights.
- Blog-to-video: Turn written content into narrated video presentations.
- AI voiceover generation: Select from a variety of tones and languages.
- Automatic subtitles: Captions are auto-generated and can be styled.
- Aspect ratio conversion: Instantly generate vertical, square, or horizontal versions.
Why you should use it: If you have existing video or written content and want to turn it into a social-ready video automatically, Pictory is better equipped than Pippit. It handles content slicing and formatting more intelligently.
4. Animoto
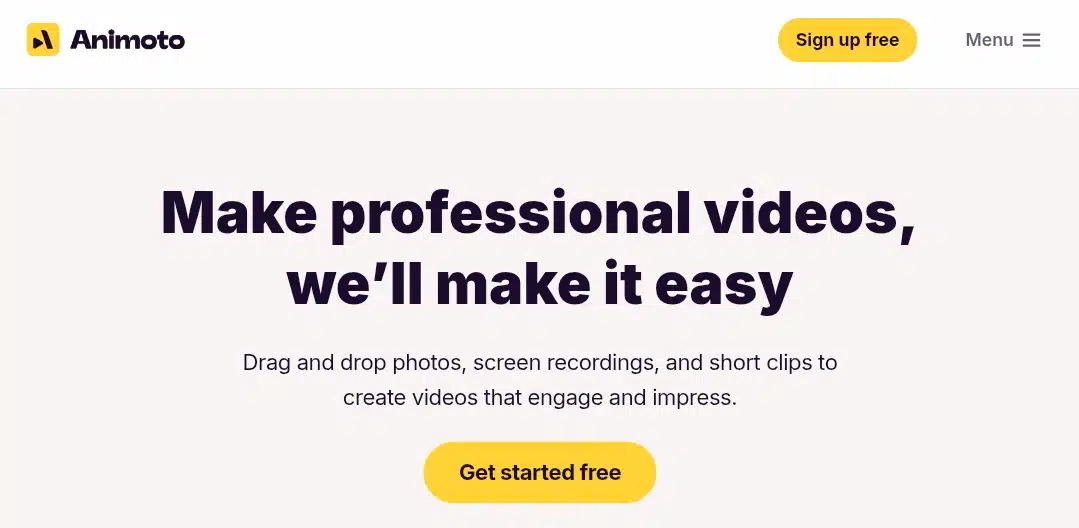
Why it’s a strong alternative to Pippit AI: Animoto may not use in-depth AI like Pippit, but it’s still a strong alternative for fast, visually aesthetic videos. It’s more user-friendly than Pippit for beginners and still delivers professional-looking results, especially for social ads, sales videos, and product features.
Key features:
- Slideshow video builder: Add product images, text, music, and transitions.
- Drag-and-drop timeline: No video editing experience required.
- Commercial music library: Choose licensed background tracks.
- Custom branding: Add logos, brand colors, and fonts.
- Pre-built templates: Optimized layouts for e-commerce, promos, and testimonials.
Why you should use it: Animoto is reliable if you need automated video output from photos, screenshots, or product showcases. It’s easier to use than Pippit and great for turning simple assets into attention-grabbing social videos.
Now, let’s run through the article.
Key takeaways from the article
- Pippit AI is built for e-commerce content creation, offering tools that generate videos, images, and marketing visuals directly from product links or text.
- The platform is beginner-friendly, with a low learning curve and an intuitive layout that makes onboarding smooth even on mobile.
- You can create content fast, using tools like the AI Image Generator and Video Generator, which include pre-cleared assets, avatars, music, and templates.
- The one-click publishing feature is useful. It allows users to schedule and post directly to TikTok, Facebook, and other platforms, which is ideal for social sellers.
- While automation is impressive, generated content often requires some manual adjustment to reach professional or brand-aligned standards.
- The credit-based system can feel limiting, especially with regard to the free plan. Serious creators will need a paid subscription to scale output.
- Batch processing and integration with CapCut are strong points, allowing bulk exports and smoother editing experiences.
- Pippit AI is perfect for solo creators and small businesses, but may not fully replace creative teams for advanced or highly customized campaigns..
Final words on Pippit AI
One thing that practically using Pippit AI ensured during this testing experience is clarity. This knowledge made it evident that Pippit AI is a tool for content creators who work with affiliations that do not frown at AI-generated video against human-shot and directed work, and also small e-commerce businesses, because a brand like Pepsi or Calvin Klein wouldn’t consider Pippit AI for their marketing campaigns. Pippit AI needs human refinement and has a limited touch of realism. I mean, real stuff will always stay that way, no matter what.
The pricing is not affordable either, and it can be unclear. Pippit AI is subscription-based, but still talks about credits. So what is worth paying attention to? Although this is explained in the FAQ section below, it’s initially all over the place for new sign-ups.
Apart from the limitations, Pippit AI’s interface is organized and navigable. It’s literally eye candy. And it’s 5 power features: One-Click Video Solution, AI-Powered Product Images, AI Avatars, and Voices
Pre-Cleared Commercial Creative Assets, Auto-Publishing, and Analytics are really encompassing.
Lastly, I recommend you take advantage of its free trial of 100+ credits to try it out for yourself. There’s nothing to lose, and in fact, there’s a lot to gain.
Frequently Asked Questions (FAQs) about Pippit AI
Can I upload and use my own media (music, images, videos)?
Yes. You can upload your own media into Pippit AI and integrate it with templates. Just be sure your uploads are licensed adequately if they’re copyrighted. The platform doesn’t restrict uploads, but you remain responsible for rights clearance.
Do I need design or editing experience to use Pippit?
No. Pippit is beginner-friendly. AI powers most features, so you can create polished content without needing professional design or video editing skills.
Do unused credits ever expire?
Yes, but it depends on the type. Credits from your subscription expire when that subscription ends. If you purchase extra credits, they last up to two years. Task or event credits expire according to each offer’s rules
Is there a desktop or mobile app for Pippit AI?
No. Pippit is accessible only through a web browser. There is no dedicated mobile or desktop app available at this time.
What happens if I cancel my subscription?
You can cancel auto-renewal at any time using your account settings. After cancellation, the service remains active until the subscription period ends. After that, access to paid tools stops. You can re-enable it later if you return
How do I request a refund if I was charged incorrectly?
You can contact support through the in-app “Report a problem” button or email commercepro.support@capcut.com with your account details and reason. They’ll process refund requests for duplicate or incorrect charges promptly
Which platform lets me publish directly from Pippit?
Pippit supports scheduling and publishing to TikTok, Instagram, Facebook, and others. During publishing, you can add product links that turn videos into shoppable content connected to TikTok Shop or other storefronts.
What are typical generation speeds for videos or images?
Most videos and product images are generated within seconds, even when batching tasks. Complex jobs or larger files may take longer, but the platform is designed for speed and efficiency.
Can new features appear without extra charges?
Yes. As long as your subscription is active, new features may appear without additional fees. However, some advanced capabilities may still require credit use. Check in-app notifications or plan details to confirm.
How can I stop my subscription from automatically renewing?
To turn off auto-renewal, go to the top-right corner of your dashboard and select the “Subscription” option. From there, choose “Disable auto-renewal.” If you decide to resubscribe later, you can return to this section and click “Renew.”
How do I connect my social media or store account?
Click on your profile icon at the top-right corner of the screen and open “Account Authorization.” Then, select “Details,” choose “Link,” and follow the instructions in the pop-up window to complete the connection. If you’re not already signed in on your device, you’ll need to log in to that account first.
How do I disconnect or switch the account linked to my profile?
Start by clicking your profile icon and going to “Account Authorization.” Next, open “Details,” and select “Unlink” to disconnect the current account. Once that’s done, you’ll be able to connect a different one by repeating the linking steps.

