When you’re designing in Canva, it’s easy to end up with dozens of text boxes, shapes, icons, and images all floating on the same page. You want things lined up, spaced evenly, and easy to move, but managing each element one by one quickly turns messy.
Grouping solves this problem. It lets you select multiple elements and turn them into a single unit. Once grouped, you can move everything together, resize it at once, duplicate it, or align it without having to fix things afterward.
In this guide, you’ll learn exactly how to group elements in Canva across desktop, mobile, iPad, and even using keyboard shortcuts. You’ll also see when grouping works, when it doesn’t, and how to fix common issues when the option doesn’t show up.
Let’s get started!
Why you should organize your elements in Canva
Designs get messy fast when you’re working with lots of elements. Organizing them, especially through grouping, makes the process smoother and saves time. Here’s why it matters:
- Easier to move and resize: Instead of dragging each element one by one, grouped items can be moved or resized together without messing up your layout.
- Speeds up editing: If you’re creating multiple versions of a design (say, for different platforms), you won’t have to realign everything from scratch.
- Keeps things consistent: Grouping helps maintain the structure of repeating sections like headers, logos, or call-to-actions, especially when working with templates.
- It simplifies alignment: Centering, distributing, or spacing out a group is much easier than doing it for individual items.
- Cleaner workspace: When elements are grouped logically (e.g. image + caption, button + text), it’s easier to navigate and make changes later.
- Reduces mistakes: It prevents you from accidentally moving or deleting part of a design while adjusting something nearby.
- Useful when collaborating: If others are working on the same project, grouped elements make it clear what should stay together.
Before we jump into how to group elements step by step, let’s quickly go over what Canva actually allows you to group and what it doesn’t.
What you can and can’t group in Canva
Grouping in Canva works well for most elements, but not everything can be grouped together. Knowing what’s allowed can save you from frustration, especially when the “Group” option isn’t showing up.
What you can group
- Text boxes: Whether it’s a headline, subheading, or body text, you can group any combination of text elements together.
- Shapes and icons: All Canva shapes, lines, and icons can be grouped with each other or with other element types.
- Photos and images: You can group images with text or other design elements to create reusable layouts.
- Frames and grids: These can be grouped with other elements, but keep in mind that their internal contents (like images in a frame) stay independent.
- Stickers and illustrations: Most Canva-provided stickers and illustrations are fully groupable.
- Grouped elements: You can also group already-grouped items into larger sets. Canva supports nested grouping.
What you can’t group
- Videos with other elements: Canva usually doesn’t let you group videos with text, images, or graphics.
- Elements across multiple pages: Grouping works only within a single page.
- Locked elements: If an element is locked, it won’t group until it’s unlocked.
- Some charts and tables: These can act as standalone objects, and some may not allow grouping depending on their source or settings.
- Embedded apps or widgets: Third-party plugin elements often can’t be grouped.
If you’re trying to group and nothing’s happening, it’s usually one of these reasons. We’ll cover common fixes later on, but for now, let’s walk through how to group elements on different devices.
How to group elements in Canva on desktop
Grouping elements in Canva on desktop is a straightforward process that enhances your design workflow. Here’s how to do it:
Step 1: Select the elements you want to group
- Using Click and Drag: Click and hold your mouse button, then drag over the elements you wish to group. This action will select all elements within the dragged area.
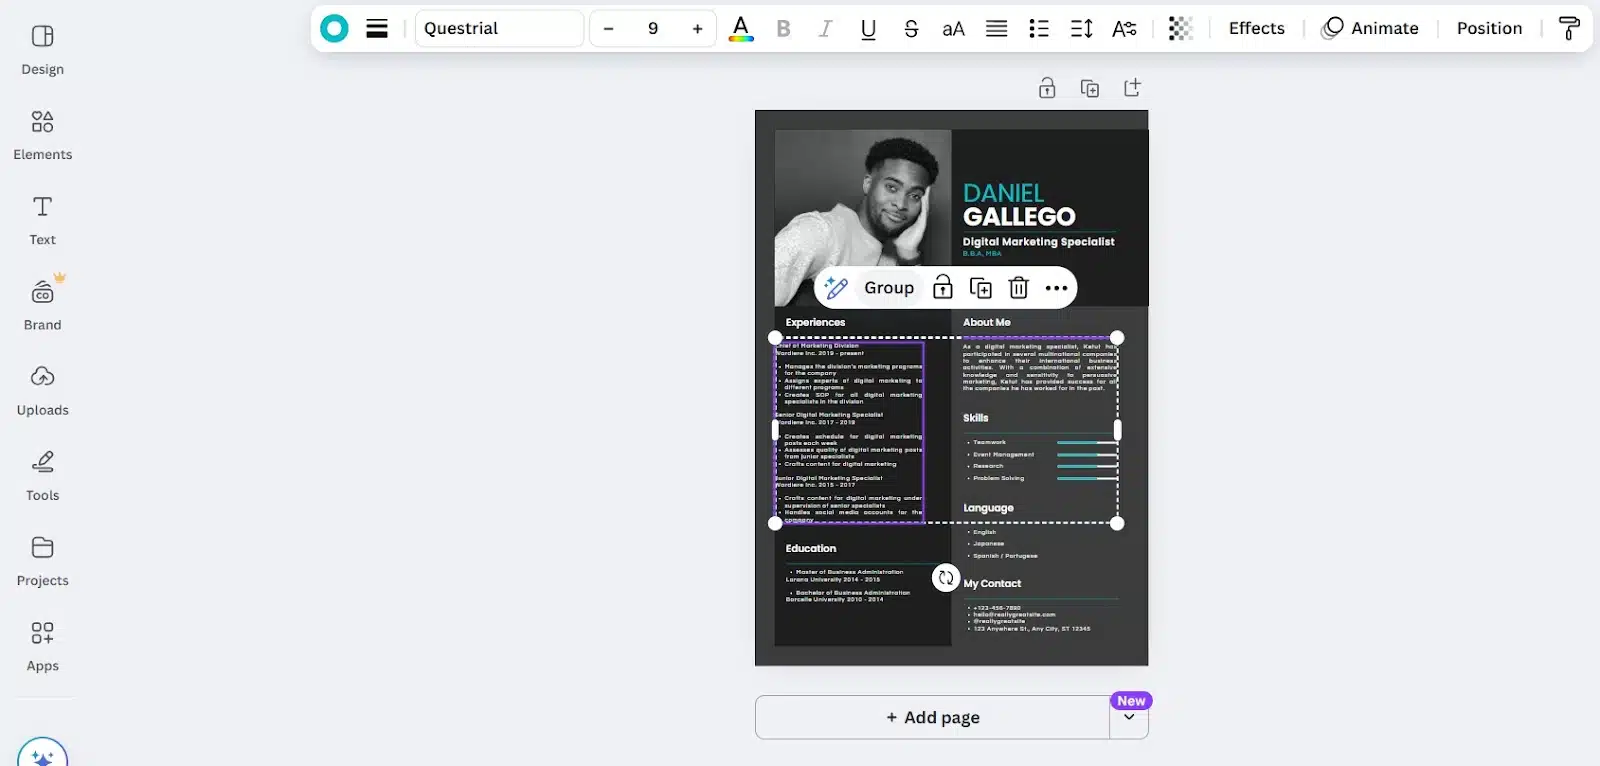
- Using Shift-Click: Click on the first element, then hold down the Shift key and click on each additional element you want to include in the group. This method allows for precise selection, especially when elements are scattered.
Step 2: Group the selected elements
- Using the Toolbar: Once your elements are selected, a toolbar will appear above or near the selection. Click on the Group button to combine the elements into a single group.
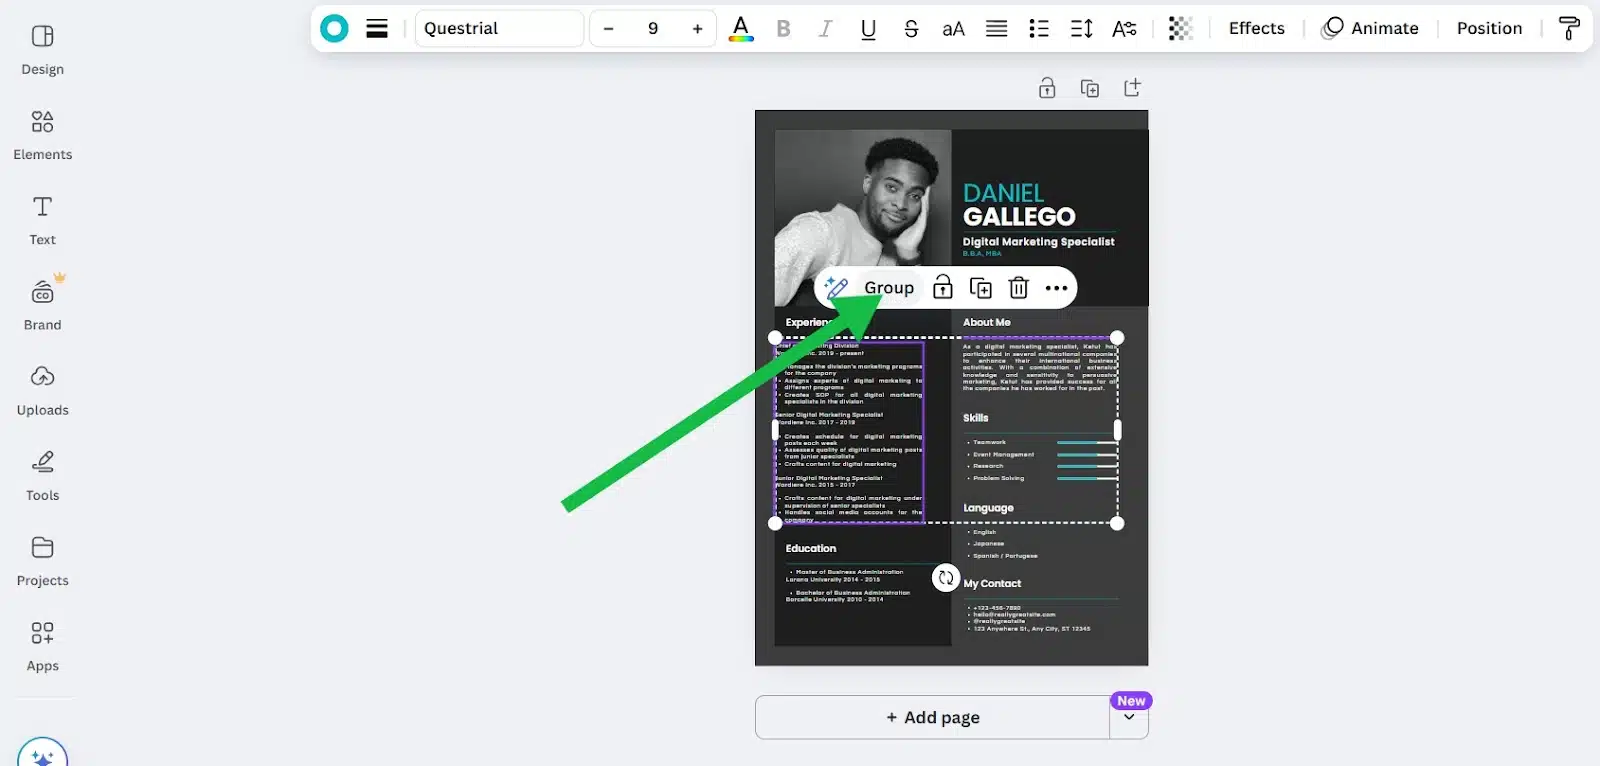
- Using Right-Click: Right-click on one of the selected elements and choose Group from the context menu that appears.
- Using Keyboard Shortcuts:
- Windows: Press Ctrl + G
- Mac: Press Command + G
These shortcuts provide a quick way to group elements without using the mouse.
Step 3: Editing and managing the group
- Moving the Group: Click and drag the grouped elements to reposition them on the canvas.
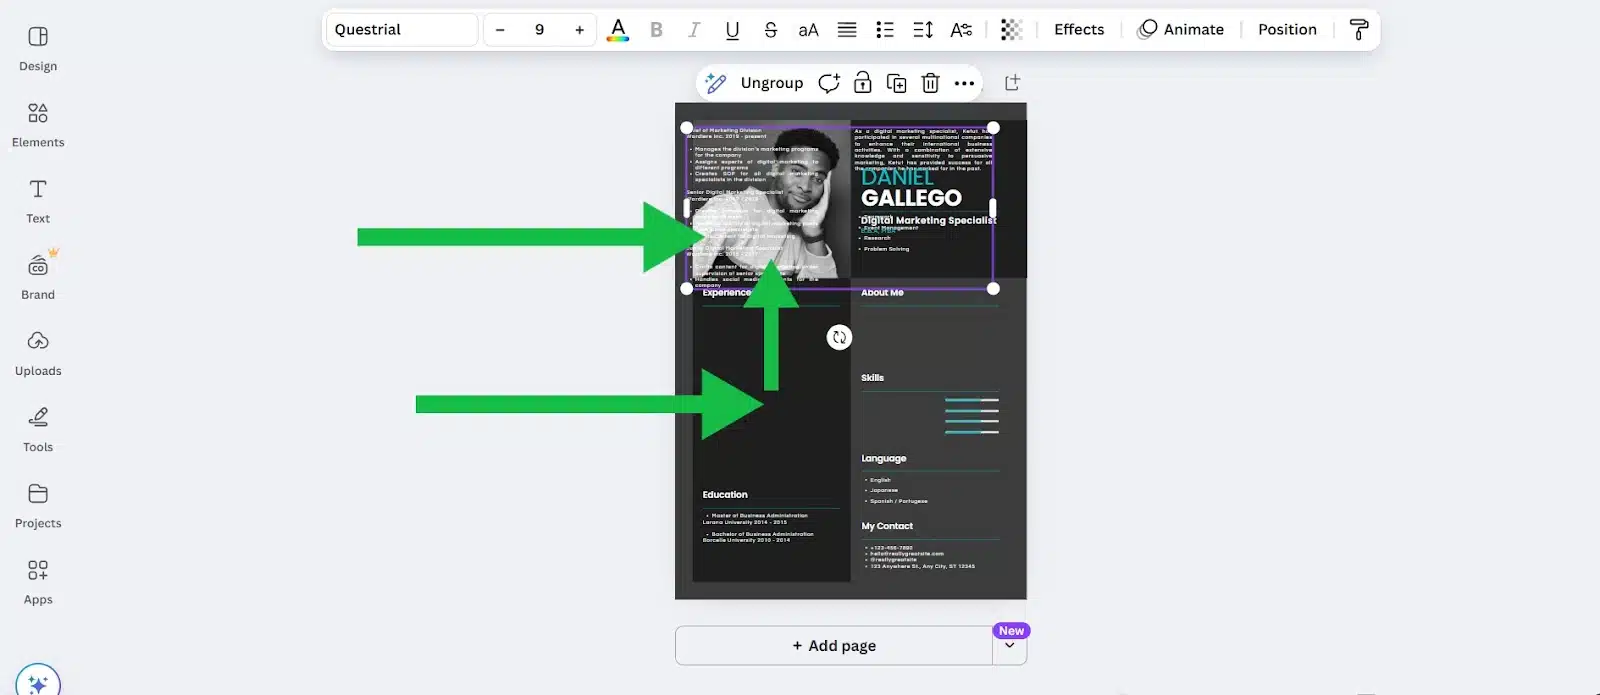
- Resizing the Group: Click on the group to reveal the bounding box, then drag the corners to resize all elements proportionally.
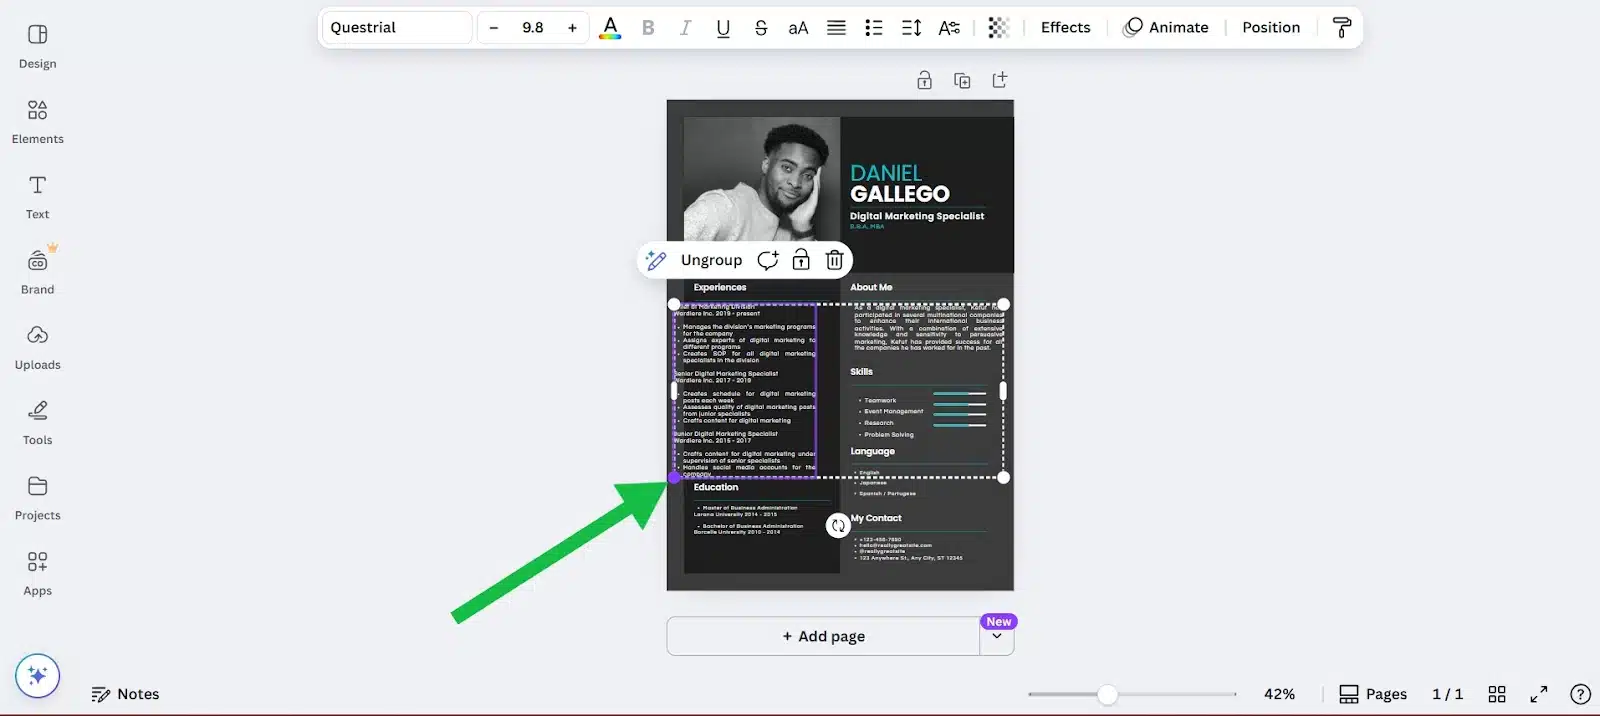
- Editing Individual Elements: Double-click on the group to enter isolation mode, allowing you to edit individual elements within the group without ungrouping.
- Ungrouping Elements:
- Using the Toolbar: Select the group, then click on the Ungroup button in the toolbar.
- Using Right-Click: Right-click on the group and select Ungroup from the context menu.
- Using Keyboard Shortcuts: For Windows, press Ctrl + Shift + G and for Mac, press Command + Shift + G.
Ungrouping allows you to edit or rearrange individual elements as needed.
By mastering these grouping techniques on Canva’s desktop platform, you can streamline your design process, maintain consistency, and efficiently manage complex layouts.
How to group elements in Canva on mobile (iPhone & Android)
Designing on the go with Canva’s mobile app is convenient, but managing multiple elements can become challenging. Fortunately, Canva allows you to group elements on mobile devices, streamlining your design process. Here’s how to do it:
Step 1: Select the first element
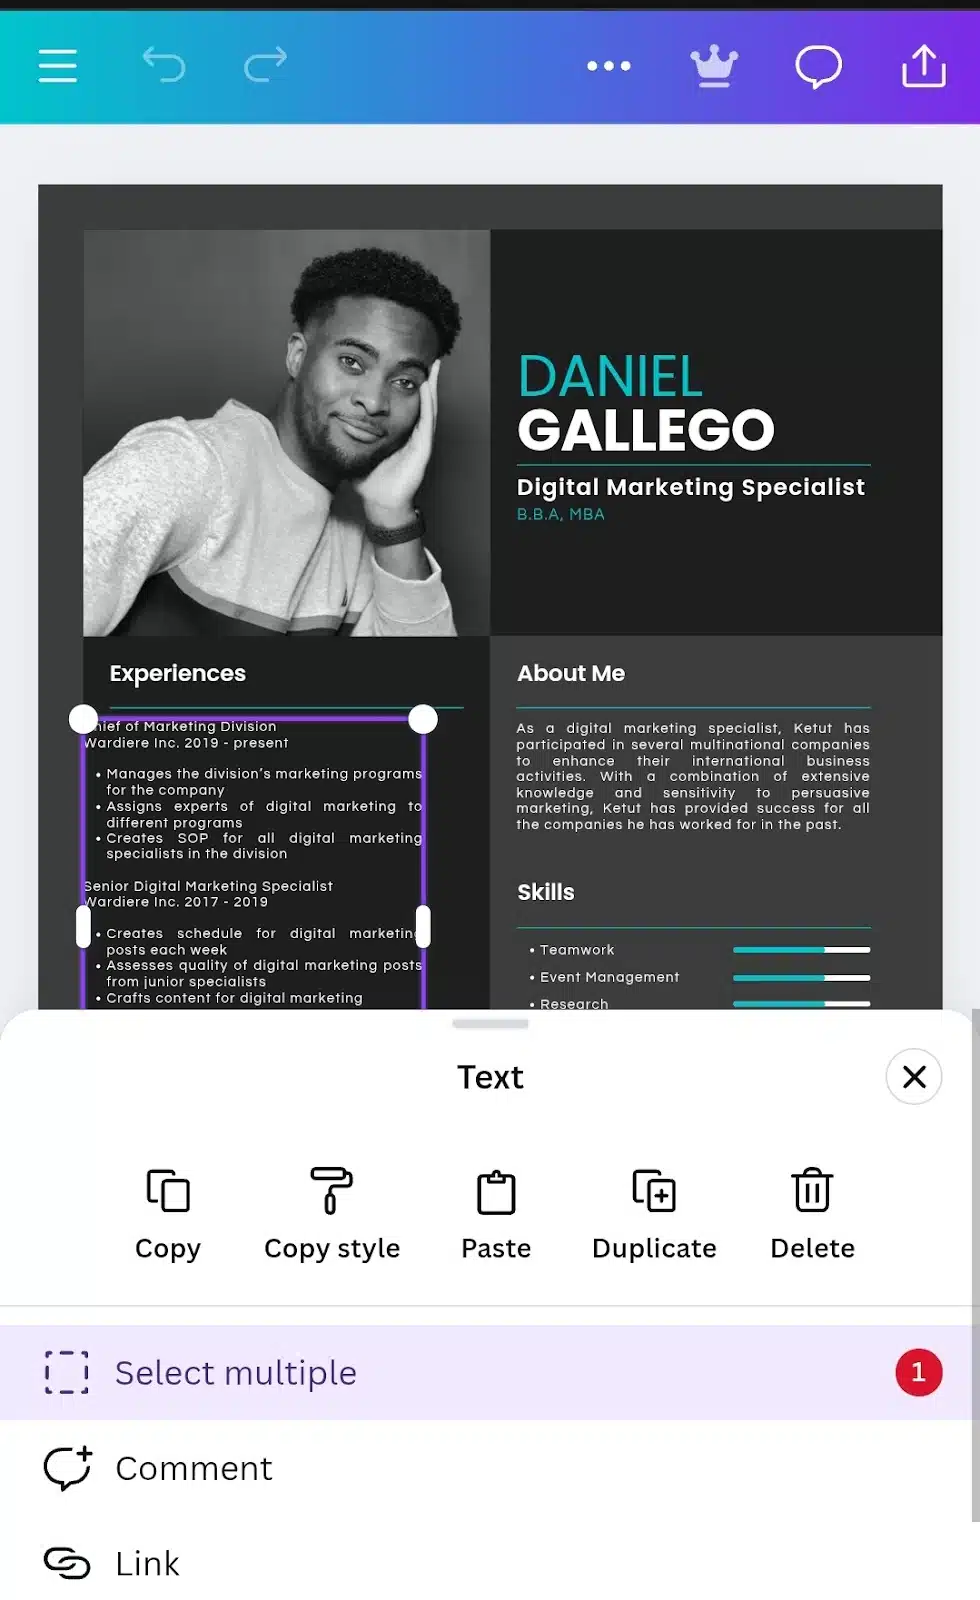
Tap on the first element you wish to group. This will highlight the element and bring up a toolbar at the bottom of the screen.
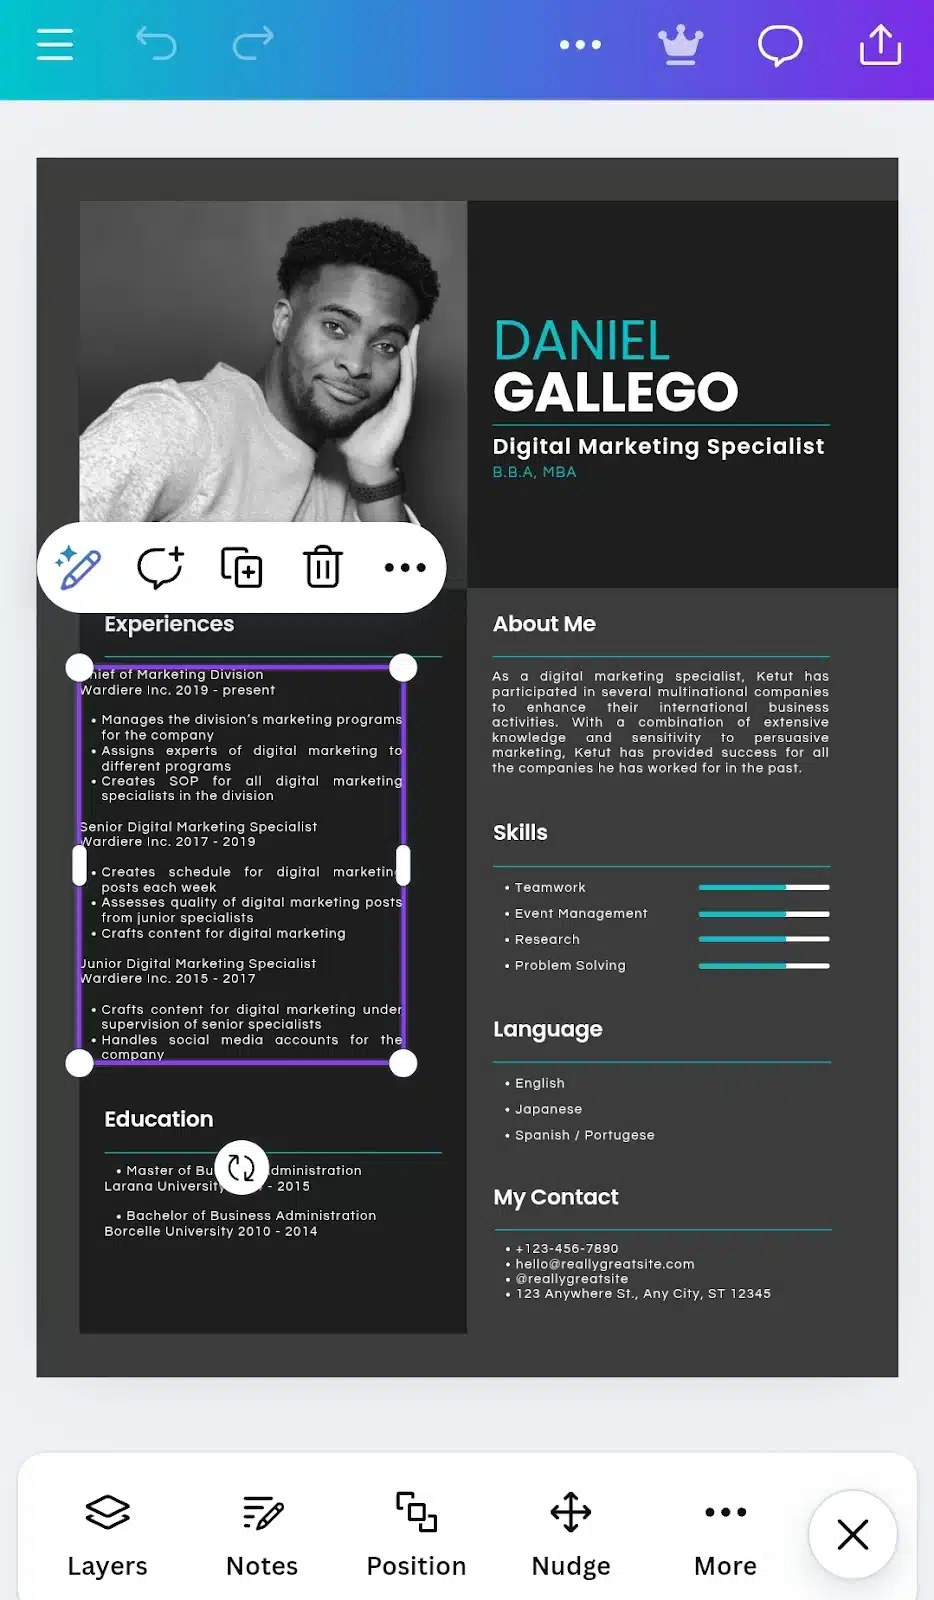
Step 2: Access the ‘Select Multiple’ option
In the toolbar, tap on the More option (represented by three dots). From the menu that appears, select Select Multiple.
Step 3: Select additional elements
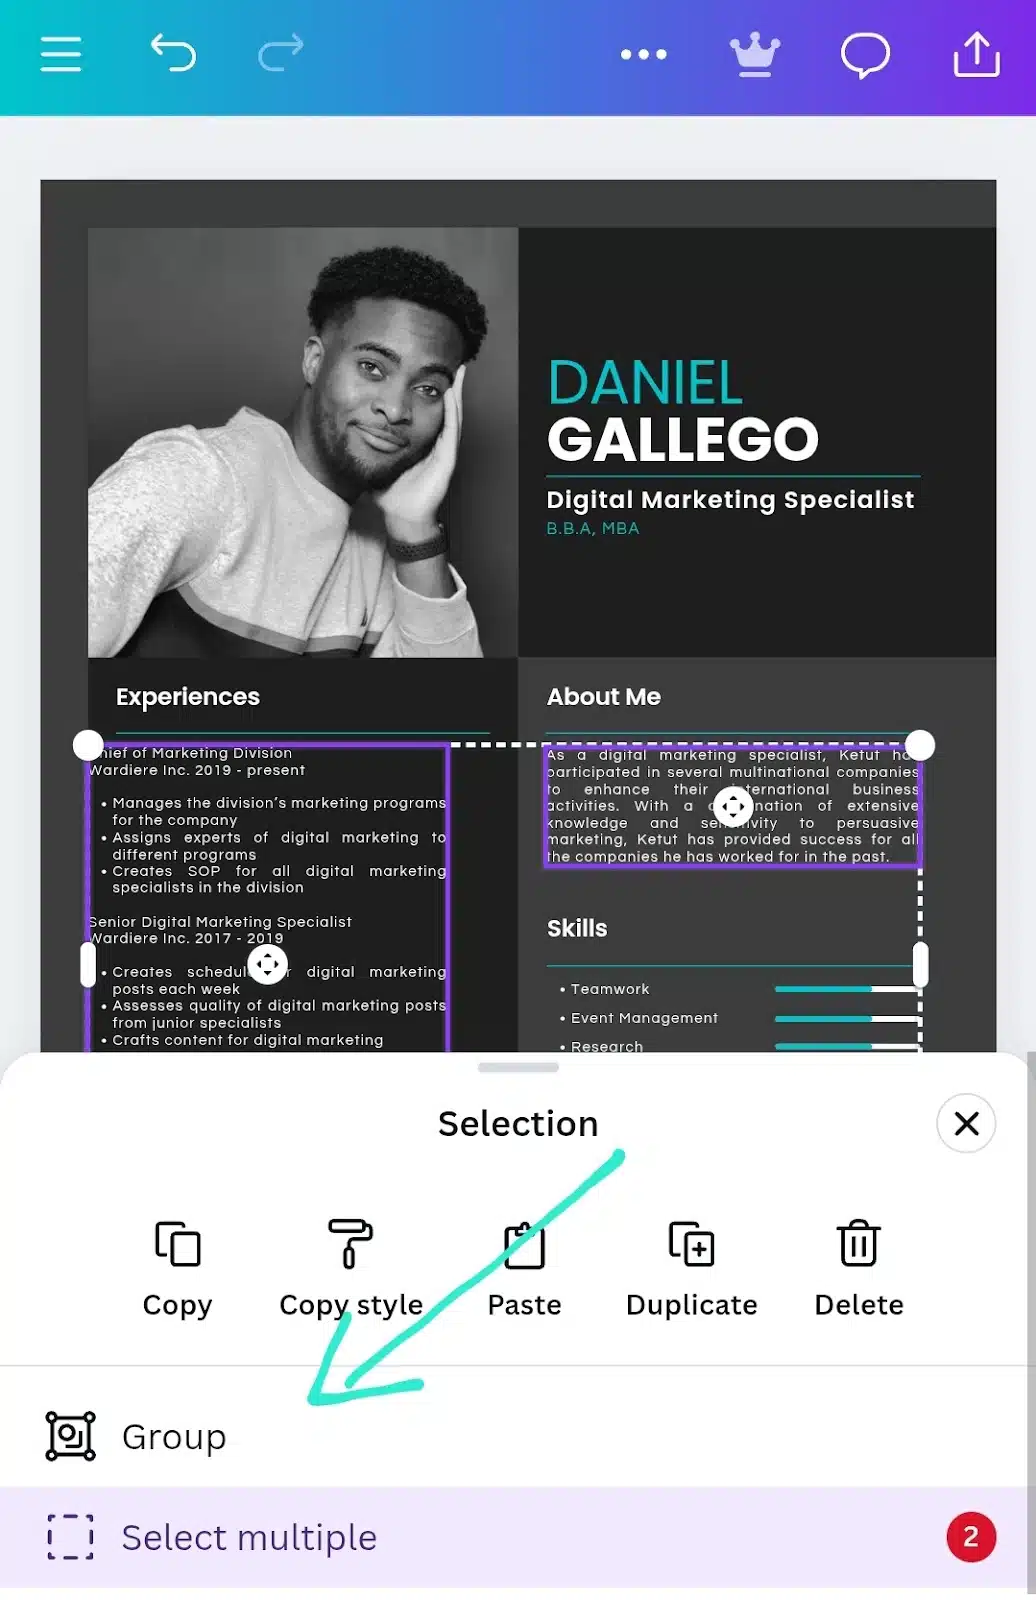
After activating the ‘Select Multiple’ mode, tap on each additional element you want to include in the group. Each selected element will be highlighted.
Step 4: Group the selected elements
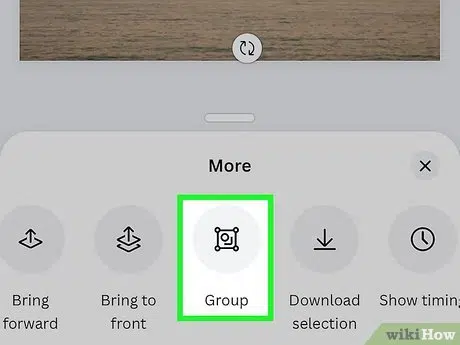
Once all desired elements are selected, a new toolbar will appear at the bottom. Tap on the Group option to combine the elements into a single group.
Step 5: Manage the Group
- Moving the Group: Tap and drag the grouped elements to reposition them on the canvas.
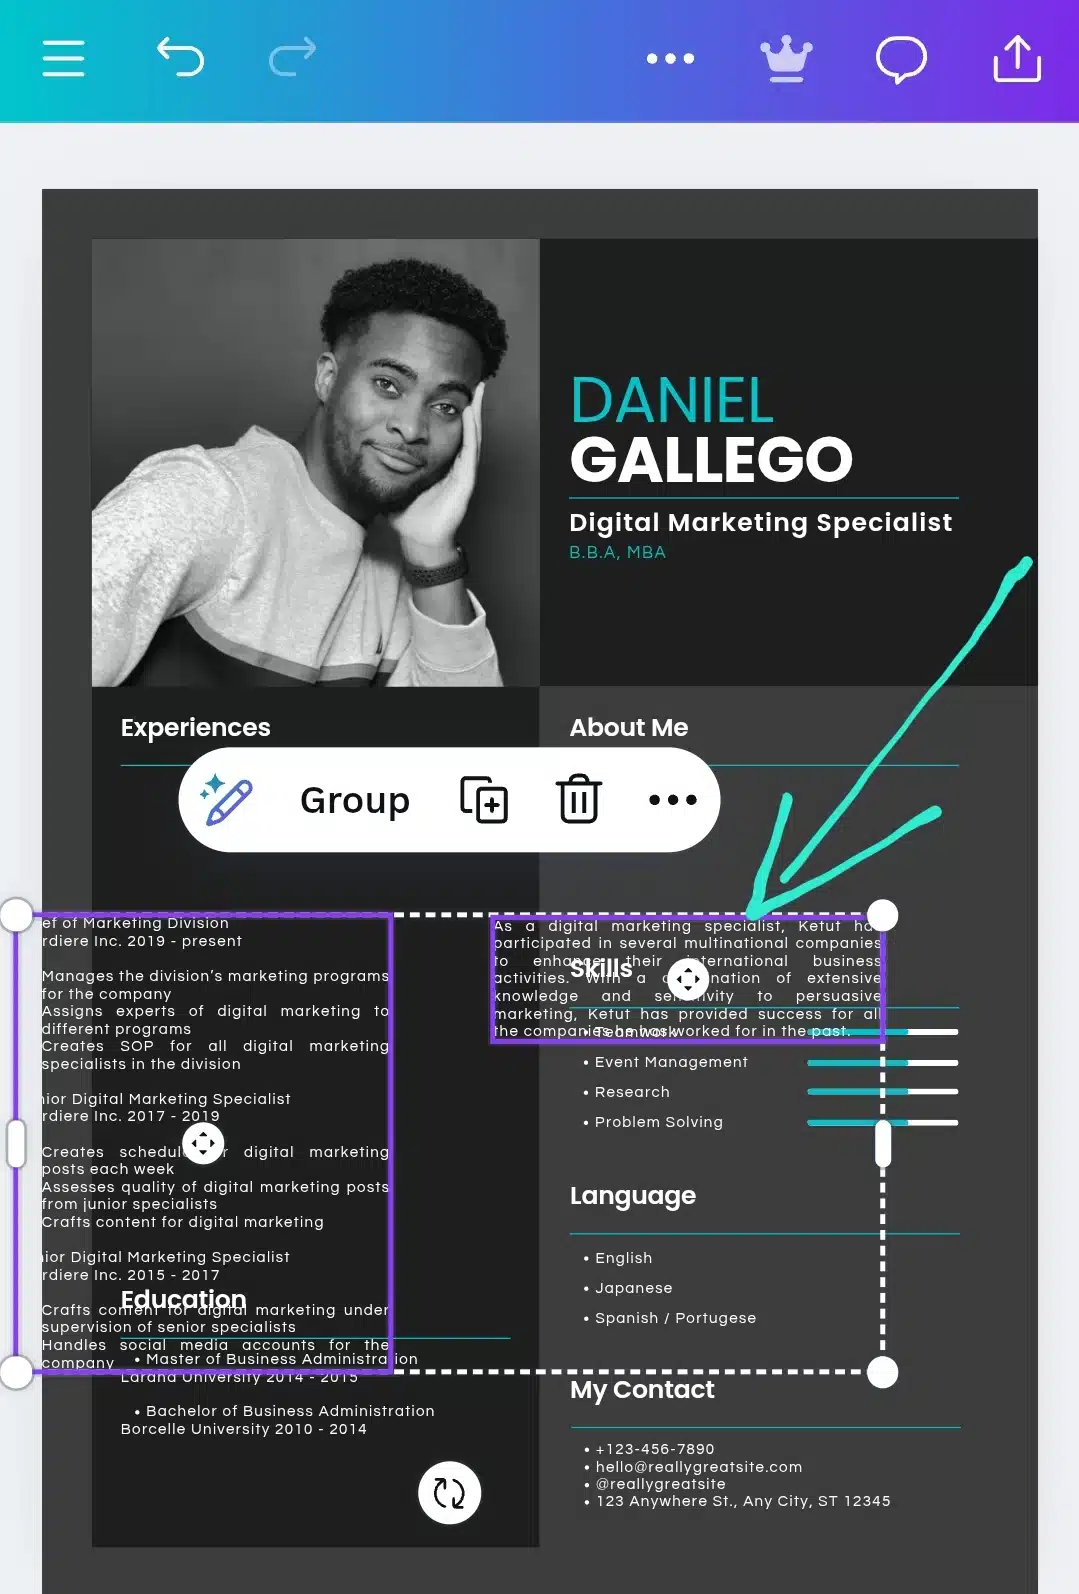
- Resizing the Group: Tap on the group to reveal the bounding box, then drag the corners to resize all elements proportionally.
- Editing Individual Elements: To edit a specific element within the group, tap on the group, then tap on the element you wish to edit. This will isolate the element for editing without ungrouping.
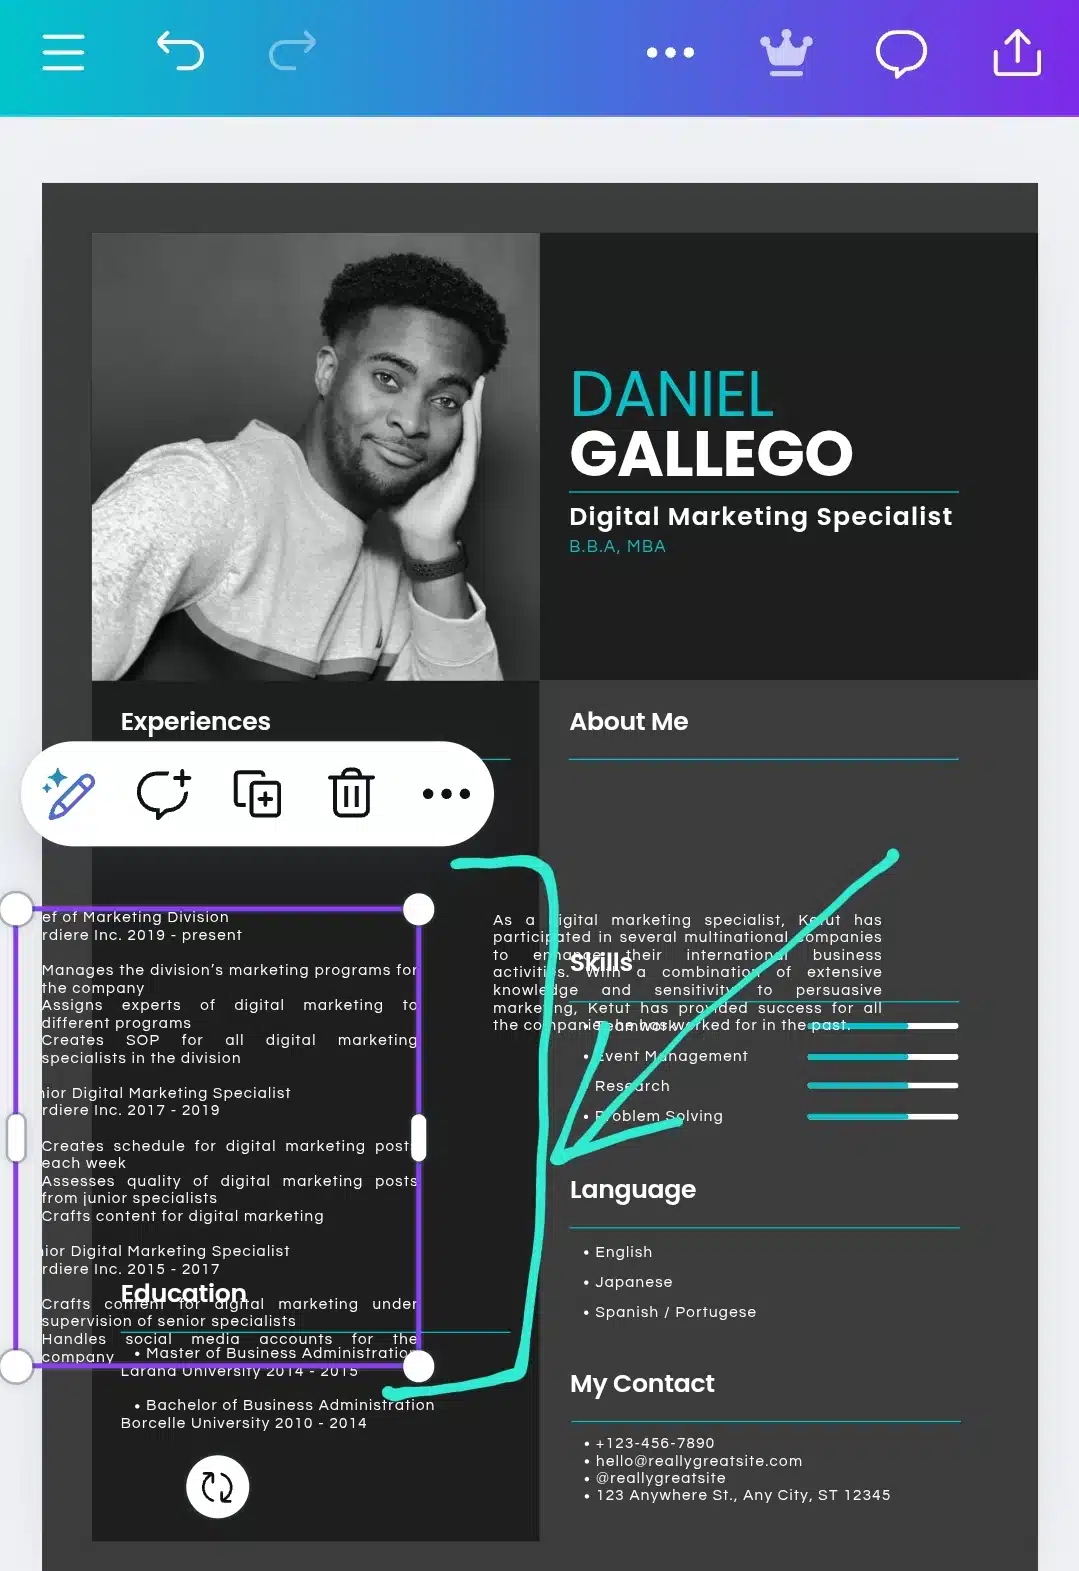
- Ungrouping Elements: Tap on the grouped elements to select them, then tap on the Ungroup option in the toolbar to separate them back into individual elements.
Note: If you have difficulty selecting an element that’s layered beneath another, consider temporarily moving the top element aside to access the one below.
By mastering these steps, you can efficiently manage and organize your designs in Canva’s mobile app, ensuring a smoother creative process wherever you are.
How to group elements in Canva on iPad
The iPad version of Canva offers more space and flexibility than a phone, making it ideal for multitouch designing. Grouping elements here is just as handy and follows a process that blends mobile gestures with desktop-style features.
Step 1: Tap to select the first element
Start by tapping the first element you want to include in the group. A toolbar will appear either above the selected item or at the bottom of your screen.
Step 2: Activate ‘Select Multiple’
Look for the Select Multiple button. This may be represented by a plus (+) icon or a “select” button in the floating menu. Tap it.
Step 3: Tap other elements to add to the group
Now that you’re in selection mode, tap each additional element you want to include. Canva will highlight each selected item. You can even pinch to zoom in for more precise selections.
Step 4: Tap ‘Group’
Once everything is selected, a new toolbar will appear, typically at the bottom. Tap the Group option to combine the items into one unit.
Step 5: Manage your group
- Move the group by tapping and dragging it.
- Resize it using the bounding box handles.
- Double tap to edit an individual item within the group.
- To ungroup, tap the group, and choose Ungroup from the toolbar.
Tip: If you’re using an Apple Pencil, grouping works just the same, you can use it to tap and select elements, or your fingers for pinch-to-select movements.
Designers using an iPad often juggle many elements at once, so getting comfortable with grouping can speed things up and reduce clutter in your layout.
Reordering layers within a group
Layering works inside a group just like outside. After double-clicking to enter the group:
- Select the element you want to move.
- Use Position > Forward or Backward to rearrange it.
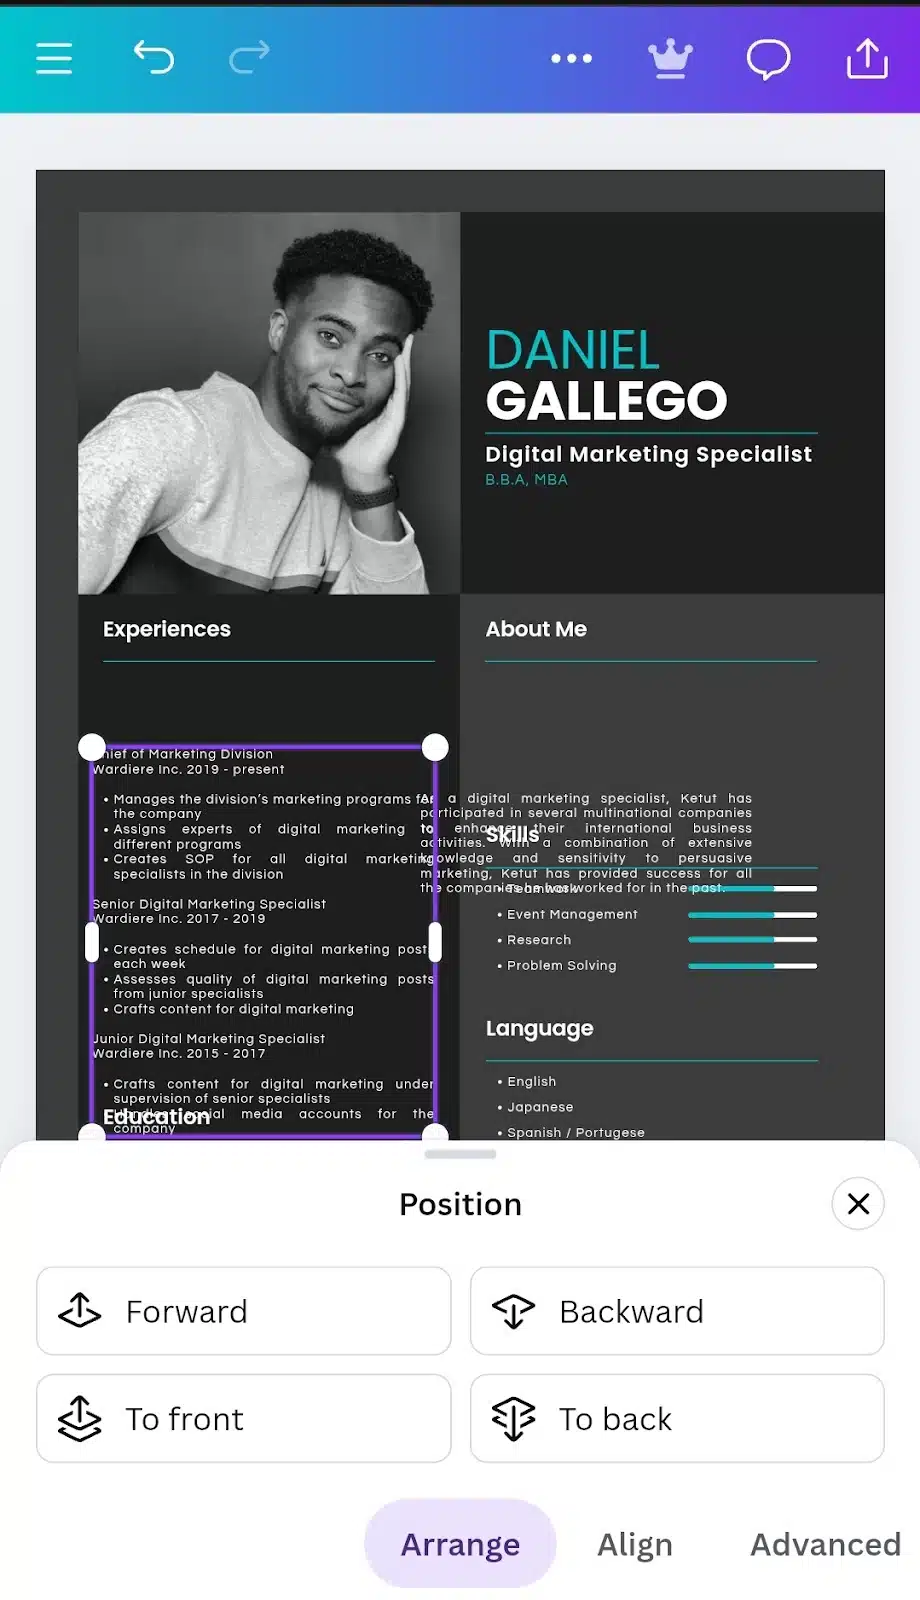
- On desktop, you can also right-click and select Bring to Front or Send to Back.
This is helpful if text is hidden behind a shape, or if you want to emphasize one element over another.
Locking a group after editing
Once you’re satisfied with your grouped layout, you can lock the group to avoid accidental changes.
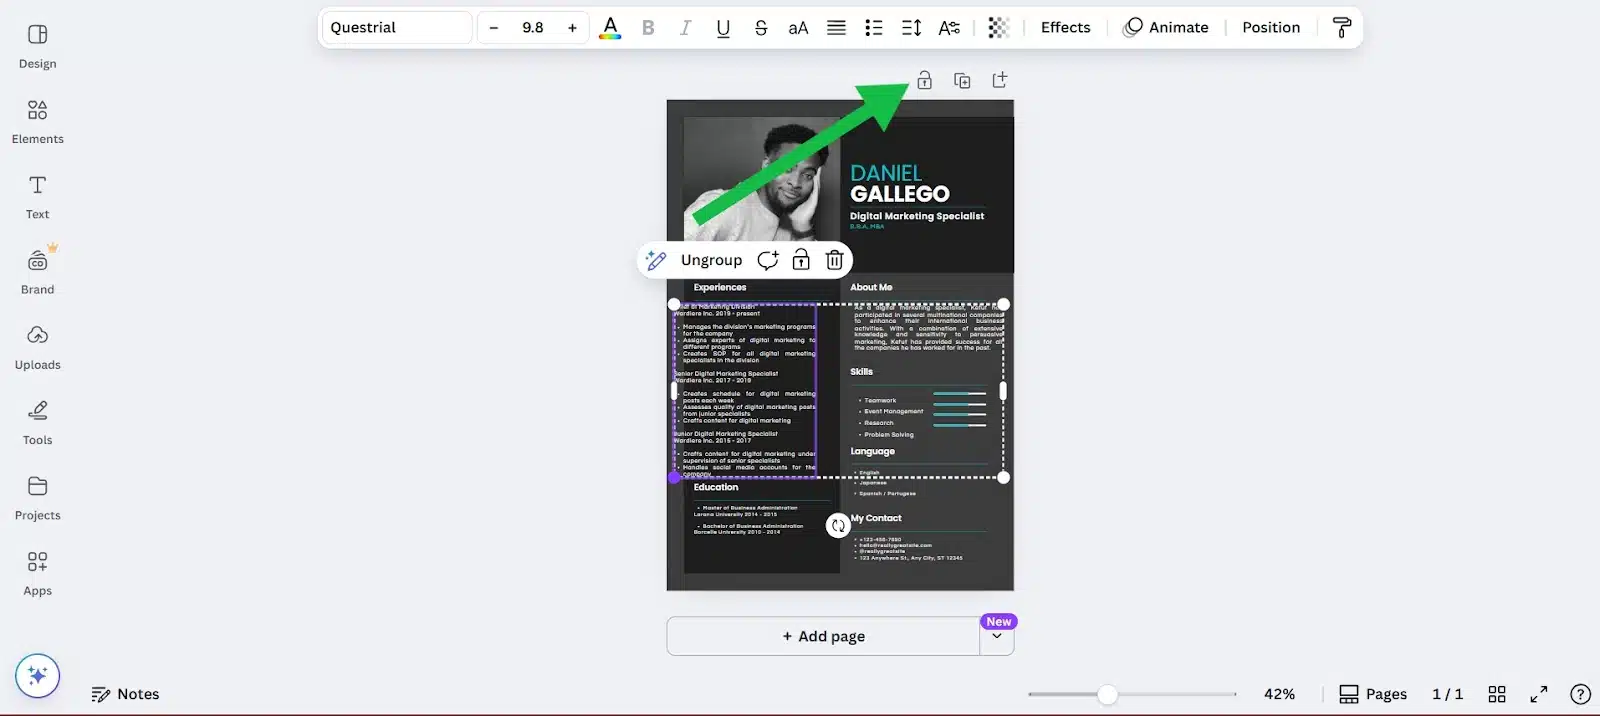
- Select the group.
- Click the Lock icon from the top toolbar (desktop), or from the bottom menu on mobile/tablet.
Locked groups can’t be moved, edited, or resized until you unlock them. This is ideal when you’re finalizing layouts.
Creative use cases for grouping in Canva
Grouping elements doesn’t just help you keep things tidy. It’s a smart design move that can seriously speed up your workflow and help you stay consistent across projects. Here are a few practical and creative ways to make the most of grouping.
Create reusable sections
If you design things like headers, testimonials, or specific page layouts often, grouping can turn them into reusable blocks. Once grouped, you can duplicate that block and drag it into any design, tweak the text or images, and you’re done.
For example, a testimonial block with a profile photo, name, and quote can be grouped, duplicated, and updated for different clients without rebuilding it each time.
Duplicate grouped content across pages
Need the same footer or header across several pages? Once you’ve grouped your elements, it’s just a matter of copying and pasting to other pages. Canva keeps everything aligned and scaled, so you don’t have to manually reposition each element again.
This is perfect for:
- Multi-page presentations
- Workbooks
- eBooks
- Slide decks
Work faster on templates & social media posts
If you regularly create templates for social media, grouping speeds things up. You can group the post layout, including image frame, text box, icons and simply duplicate it for new posts.
It keeps spacing and structure consistent across designs, and you only need to change the actual content. This is especially useful for:
- Instagram carousels
- Quote graphics
- Product features
- Promo banners
Once you start using grouping as part of your design strategy, you’ll find it saves time and gives your projects a more professional, polished look.
Common mistakes to avoid when grouping in Canva
Grouping in Canva is simple, but there are a few common pitfalls that can lead to frustration or messy designs, especially when working with many elements. Here’s what to look out for and how to avoid them.
- Grouping too early
It’s tempting to group elements as soon as you place them, but doing it too early can slow you down. If you group before finalizing text, images, or spacing, you’ll find yourself constantly ungrouping to make edits. It’s best to wait until the layout feels set before hitting “Group.”
- Forgetting to lock groups
After you’ve created and positioned a group, not locking it can lead to accidental changes. One wrong click or drag can shift your whole layout. Use the Lock tool to keep your groups stable, especially when working on complex designs with overlapping elements.
- Over-grouping everything
While grouping is useful, doing it excessively, like grouping inside of groups inside of other groups, can make editing harder. Keep it simple. Only group what actually needs to stay together.
- Ignoring alignment before grouping
Grouping doesn’t magically align your elements. If items aren’t spaced or lined up properly before grouping, they won’t be afterward either. Use Canva’s Position tools first to tidy up, then group.
- Not naming or labeling layers (For Pros)
If you’re working with lots of overlapping layers, especially in the desktop version, consider naming important elements or groups. It helps when navigating layers in complex designs.
Avoiding these small mistakes can save you a lot of backtracking and make your Canva designs more efficient and enjoyable to build.
Troubleshooting common element grouping issues in Canva
Even though grouping is straightforward, there are times when Canva just doesn’t behave the way you expect. If you’re running into issues, here are some common problems and how to fix them.
“Group” option is missing
If you can’t find the Group button, check the following:
- Selection issue: You might not have more than one element selected. Canva only enables grouping when two or more items are chosen.
- Locked elements: If one of the selected items is locked, you can’t group. Unlock it first, then try again.
- Mixed media issues: Occasionally, trying to group incompatible elements (like a background image with certain effects) can cause the option to disappear.
You can’t select multiple elements on mobile
On mobile, you need to first tap an element, then tap Select Multiple (or the “+” icon) before choosing others. If this option isn’t showing:
- Make sure you’re using the Canva app, not the mobile web browser version.
- Try zooming out slightly because some touch gestures won’t work when you’re too zoomed in.
- Update the app if it’s outdated.
Group won’t move or resize
This usually happens when:
- The group is locked: Check for the lock icon and unlock it.
- It’s grouped with a background or fixed element: Ungroup and isolate what you need, then try again.
- There’s a hidden layer interfering – Sometimes an invisible shape or frame is sitting in the way. Check your layers by selecting elements one by one.
Ungrouped by accident?
If you ungrouped something and want to reverse it quickly, hit Undo (Ctrl+Z or the back arrow at the top of the screen). Canva remembers your previous state unless you’ve closed the file.
Final thoughts
If you’ve ever felt like your Canva design was getting out of hand with elements everywhere, grouping is your fix. It’s not some fancy trick. It’s just one of those simple habits that make designing easier.
You don’t need to use it for everything. But when you’ve got a layout you want to repeat, or parts of your design that should stay together, grouping keeps things clean and saves you time. Especially when you’re working with lots of pages or posts.
Play around with it. Group things, ungroup them, move them around. The more you use it, the more natural it becomes.

